Tag Archives: fortinet hardware

Fortinet Hardware Installation

Racked Some New Gear

We got some new hardware in the other day that we decided to rack today. Nothing too fancy, a few FortiGate 300D’s for an HA cluster, a few FortiSwitches, A FortiManager 200D and a FortiAnalyzer 200D. This are replacing older antiquated 100C units that we have hacked (installed a SSD in each) and prodded until they just couldn’t keep up anymore. The below picture is a quick shot of the devices before cable management and full connectivity has been completed.

You could say we have a pretty strong affinity for Fortinet Hardware. Hopefully this shows a bit of it. What is NOT in the photo are the AP’s throughout and a few other items.

Fortinet Hardware Installation


Having trouble configuring your Fortinet hardware or have some questions you need answered? Check Out The Fortinet Guru Youtube Channel! Want someone else to deal with it for you? Get some consulting from Fortinet GURU!

New Features – Authentication

Authentication

RADIUS Framed-IP into accounting packets (234003 189828)

RADIUS attributes, including NAS-IP-Address, Called-Station-ID, Framed-IP-Address, and Event-Timestamp, are supported.

Include RADIUS attribute CLASS in all accounting requests (290577)

RADIUS attribute CLASS in accounting requests for firewall, WiFi, and proxy authentication is now supported. RADIUS attribute CLASS is returned in Access-Accept message and it is added to all accounting requests.

Certificaterelated changes (263368)

Fortinet_factory certificate has been re-signed with an expiration date of 2038 and it is used instead of fortinet_factory2, which has been removed.

Improvements and changes to per-VDOM certificates (276403 267362)

The CA and local certificate configuration is now available per-VDOM. When an admin uploads a certificate to a VDOM, it will only be accessible inside that VDOM. When an admin uploads a certificate to global, it will be accessible to all VDOMs and global.

There are factory default certificates such as Fortinet_CA_SSL, Fortinet_SSL, PositiveSSL_CA, Fortinet_Wifi, and Fortinet_Factory, these certificates are moved to per-VDOM and automatically generated when a new VDOM is created.

The Fortinet_Firmware certificate has been removed and all the attributes that use Fortinet_Firmware now use

Fortinet_Factory.

CLI Changes

Two new attributes range and source have been added: range can be global or per-VDOM, if the certificate file is imported from global, it is a global certificate. If the certificate file is imported from a VDOM, it is VDOM certificate. source can be factory, user or fortiguard:

factory: The factory certificate file with FortiOS version, this includes: Fortinet_CA_SSL, Fortinet_SSL, PositiveSSL_CA, Fortinet_Wifi, Fortinet_Factory.

user: Certificate file imported by the user.

fortiguard: Certificate file imported from FortiGuard.

config certificate local edit Fortinet_Factory

set range global/vdom

set source factory/user/fortiguard end

end

Default Root VDOM Certificates

default root vdom certificates

Certificates with the same names are also available from the global configuration. These are generated with you turn on VDOMs.


Having trouble configuring your Fortinet hardware or have some questions you need answered? Check Out The Fortinet Guru Youtube Channel! Want someone else to deal with it for you? Get some consulting from Fortinet GURU!

Traffic Shaping Policies

Traffic Shaping Policies

New Traffic Shaper Policy Configuration Method (269943)

Previously, traffic shapers were configured in Policy & Objects > Objects > Traffic Shapers and then applied in security policies under Policy & Objects > Policy > IPv4 . In FortiOS 5.4, traffic shapers are now configured in a new traffic shaping section in Policy & Objects > Traffic Shapers.

The way that traffic shapers are applied to policies has changed significantly in 5.4., because there is now a specific section for traffic shaping policies in Policy & Objects > Traffic Shaping Policy. In the new traffic shaping policies, you must ensure that the Matching Criteria is the same as the security policy or policies you want to apply shaping to.

There is also added Traffic Shaper support based on the following:

  • Source (Address, Local Users, Groups)
  • Destination (Address, FQDN, URL or category)
  • Service (General, Web Access, File Access, Email and Network services, Authentication, Remote Access, Tunneling, VoIP, Messaging and other Applications, Web Proxy)
  • Application
  • Application Category
  • URL Category


Creating Application Control Shapers

Application Control Shapers were previously configured in the Security Profiles > Application Control section, but for simplicity they are now consolidated in the same section as the other two types of traffic shapers: Shared and Per-IP.

To create an Application Control Shaper, you must first enable application control at the policy level, in Policy

& Objects > Policy > [IPv4 or IPv6]. Then, you can create a matching application-based traffic shaping policy that will apply to it, in the new Traffic Shaping section under Policy & Objects > Traffic Shaping Policy.

New attributes added to “firewall shaping-policy” (277030) (275431)

The two new attributes are status and url-category. The status attribute verifies whether the policy is set to enabled or disabled. The url-category attribute applies the shaping-policy to sessions without a URL rating when set to 0, and no web filtering is applied.

Syntax:

config firewall shaping-policy edit 1

set status enable

set url-category [category ID number]

New button added to “Clone” Shapers

You can now easily create a copy of an existing shaper by selecting the shaper and clicking the Clone button.


Having trouble configuring your Fortinet hardware or have some questions you need answered? Check Out The Fortinet Guru Youtube Channel! Want someone else to deal with it for you? Get some consulting from Fortinet GURU!

FortiBridge 4.0 Administration Guide

Introduction

FortiBridge enables you to add traffic monitoring and security devices to your network, without any loss in network integrity.

FortiBridge supports two normal modes of operation: inline mode and TAP mode. Inline mode supports network

configurations that require in-line monitoring/security devices. TAP mode supports various traffic TAP configurations, where the main network path is mirrored to the monitoring devices.

The FortiBridge product provides monitoring features to ensure that any inline or TAP devices do not impact network integrity and availability. For example, FortiBridge runs a heartbeat probe for in-line configurations, and automatically switches to Bypass mode if the heartbeat fails.

Bypass mode provides active and passive bypass circuitry. Active bypass restores the traffic path between network ports, if the monitoring path fails. If the FortiBridge suffers a catastrophic failure such as power loss, it automatically reverts to Passive Bypass mode, so that traffic flow is not interrupted.

Hardware Configurations

The FortiBridge consists of a host system (a 1U chassis), which houses up to three bypass modules.

A bypass module supports one or more network segments. A network segment provides one inline or bypass traffic path. Each segment provides two network ports (NET0 and NET1) and two monitoring ports (MON1 and MON2).

The following bypass modules are available:

  • 40G bypass module l Supports one bypass segment.
  • Supports 40G Single mode fiber (40GBase-SR4) network standards l Provides MPO/LC ports for the network ports.
  • Provides QSFP+ ports for the monitor ports.
  • Dual-rate 1/10G bypass module l Supports two bypass segments l Supports dual rate 1/10G Multimode Fiber (10GBase-SR , 1000Base-SX) network standards l Supports dual rate 1/10G Single mode fiber (10GBase-LR, 1000Base-LX) network standards l Provides MPO/LC Duplex ports for the network ports. l Provides SFP+ ports for the monitor ports.

The network ports have built-in transceivers. The monitor ports require plug-in optical transceivers. The correct transceivers are delivered (pre-installed) with your FortiBridge product.

Product Overview

Modes of Operation

Each FortiBridge segment operates in one of the following modes:

  • Inline mode l The system diverts all incoming network traffic to the monitoring ports. No traffic flows directly between the network ports.
  • The inline network element must bridge the traffic between the monitoring ports. l The system monitors the inline traffic path using a heartbeat probe.
  • In the event of a fault, the segment transitions to one of the bypass modes (Bypass, TAP or Fail-cutoff mode, depending on configuration values).
  • When the fault condition clears, the segment can automatically transition back to Inline mode (the exact behavior is defined by configuration values). The segment transitions to Inline mode only after it detects that the heartbeat probe is working again
  • TAP mode l The system sends traffic between the network ports, and incoming traffic is mirrored to the monitoring ports.
  • The system does not provide a heartbeat probe on the mirrored path (because the network path is the primary traffic path).
  • If the system loses power, the traffic path is maintained between the network ports (the segment transitions to passive bypass mode).
  • Bypass mode l The system sends traffic only between the network ports, and not to the monitoring ports.
  • Fail-cutoff mode l The system disables the links on the network ports, to simulate cable disconnection between the network devices.

Having trouble configuring your Fortinet hardware or have some questions you need answered? Check Out The Fortinet Guru Youtube Channel! Want someone else to deal with it for you? Get some consulting from Fortinet GURU!

RADIUS Single Sign On – FortiAuthenticator 4.0

RADIUS Single Sign-On

A FortiGate or FortiMail unit can transparently identify users who have already authenticated on an external RADIUS server by parsing RADIUS accounting records. However, this approach has potential difficulties:

  • The RADIUS server is business-critical IT infrastructure, limiting the changes that can be made to the server configuration.
  • In some cases, the server can send accounting records only to a single endpoint. Some network topologies may require multiple endpoints.

The FortiAuthenticator RADIUS Accounting Proxy overcomes these limitations by proxying the RADIUS accounting records, modifying them, and replicating them to the multiple subscribing endpoints as needed.

RADIUS accounting proxy

The FortiAuthenticator receives RADIUS accounting packets from a carrier RADIUS server, transforms them, and then forwards them to multiple FortiGate or FortiMail devices for use in RADIUS Single Sign-On. This differs from the packet use of RADIUS accounting (RADIUS accounting on page 115).

The accounting proxy needs to know:

l Rule sets to define or derive the RADIUS attributes that the FortiGate unit requires, l The source of the RADIUS accounting records: the RADIUS server, l The destination(s) of the accounting records: the FortiGate units using this information for RADIUS SSO authentication.

General settings

General RADIUS accounting proxy settings can be configure by going to Fortinet SSO Methods > Accounting Proxy > General.

The following settings are available:

Log level Select Debug, Info, Warning, or Error as the minimum severity level of event to log from the drop-down list.
Group cache lifetime Enter the amount of time after which user group memberships will expire in the cache, from 1 to 10080 minutes (7 days). The default is 480 minutes.
Number of proxy retries Enter the number of times to retry proxy requests if they timeout, from 0 to 3 retries, where 0 disables retries. The default is 3 retries.
Proxy retry timeout Enter the retry period (timeout) of a proxy request, from 1 to 10 seconds.
Statistics update period Enter the time between statistics updates to the seconds debug log, from 1 to 3600 seconds (1 hour).

Select OK to apply your changes.

accounting proxy                                                                                                                 RADIUS

Rule sets

A rule set can contain multiple rules. Each rule can do one of:

l add an attribute with a fixed value l add an attribute retrieved from a user’s record on an LDAP server l rename an attribute to make it acceptable to the accounting proxy destination.

The FortiAuthenticator unit can store up to 10 rule sets. You can provide both a name and a description to each rule set to help you remember each rule set’s purpose.

Rules access RADIUS attributes of which there are both standard attributes and vendor-specific attributes (VSAs). To select a standard attribute, select the Default vendor. See RADIUS attributes on page 72.

To view the accounting proxy rule set list, go to Fortinet SSO Methods > Accounting Proxy > Rule Sets.

To add RADIUS accounting proxy rule sets:

  1. From the rule set list, select Create New. The Create New Rule Set window opens.
  2. Enter the following information:
Name Enter a name to use when selecting this rule set for an accounting proxy destination.
Description Optionally, enter a brief description of the rule’s purpose.
Rules Enter one or more rules.

Single Sign-On                                                                                      RADIUS accounting proxy

Action The action for each rule can be either Add or Modify.

Add: add either a static value or a value derived from an LDAP server.

Modify: rename an attribute.

Attribute Select Browse and choose the appropriate Vendor and Attribute ID in the Select a RADIUS Attribute dialog box.
Attribute 2 If the action is set to Modify, a second attribute may be selected. The first attribute will be renamed to the second attribute.
Value Type If the action is set to Add, select a value type from the drop-down list.

Static value: adds the attribute in the Attribute field containing the static value in the Value field.

Group names: adds attribute in the Attribute field containing “Group names” from the group membership of the Username Attribute on the remote LDAP server. l Services: adds attribute in the Attribute field containing “Services” from the group membership of the Username Attribute on the remote LDAP server.

UTM profile groups: adds attribute in the Attribute field containing “UTM profile groups” from the group membership of the Username Attribute on the remote LDAP server.

Value If the action is set to Add and Value Type is set to Static value, enter the static value.
Username

Attribute

If the action is set to Add, and Value Type is not set to Static value, specify an attribute that provides the user’s name, or select Browse and choose the appropriate Vendor and Attribute ID in the Select a RADIUS Attribute dialog box.
Remote LDAP If the attribute addition requires an LDAP server, select one from the dropdown list. See LDAP on page 88 for information on remote LDAP servers.
Description A brief description of the rule is provided.
Add another rule Select to add another rule to the rule set.
  1. Select OK to create the new rule set.
Example rule set

The incoming accounting packets contain the following fields:

  • User-Name l NAS-IP-Address l Fortinet-Client-IP-Address

The outgoing accounting packets need to have these fields:

accounting proxy                                                                                                                 RADIUS

  • User-Name l NAS-IP-Address l Fortinet-Client-IP-Address l Session-Timeout: Value is always 3600 l Fortinet-Group-Name: Value is obtained from user’s group membership on remote LDAP l Service-Type: Value is obtained from user’s group membership and SSO Group Mapping

The rule set needs three rules to add Session-Timeout, Fortinet-Group-Name, and Service-Type. The following image provides an example:

Sources

The RADIUS accounting proxy sources list can be viewed in Fortinet SSO Methods > Accounting Proxy > Sources. Sources can be added, edited, and deleted as needed.

To add a RADIUS accounting proxy source:

  1. From the source list, select Create New. The Create New RADIUS Accounting Proxy Source window opens.
  2. Enter the following information:
Name                                         Enter           the           name           of           the

This is used in FortiAuthenticator configurations.

RADIUS server.

Single Sign-On                                                                                      RADIUS accounting proxy

Source name/IP Enter the FQDN or IP address of the server.
Secret Enter the shared secret required to access the server.
Description Optionally, enter a description of the source.
  1. Select OK to add the RADIUS accounting proxy source.

Destinations

The destination of the RADIUS accounting records is the FortiGate unit that will use the records to identify users. When defining the destination, you also specify the source of the records (a RADIUS client already defined as a source) and the rule set to apply to the records.

To view the RADIUS accounting proxy destinations list, go to Fortinet SSO Methods > Accounting Proxy > Destinations.

To add a RADIUS accounting proxy destinations:

  1. From the destinations list, select Create New. The Create New RADIUS Accounting Proxy Destination window opens.
  2. Enter the following information:
Name Enter a name to identify the destination device in your configuration.
Destination name/IP Enter The FQDN or IP address of the FortiGate that will receive the RADIUS accounting records.
Secret Enter the preshared key of the destination.
Source Select a RADIUS client defined as a source from the drop-down list. See Sources on page 127.
Rule set Select an appropriate rule set from the drop-down list or select Create New to create a new rule set. See Rule sets on page 125.
  1. Select OK to add the RADIUS accounting proxy destination.

Having trouble configuring your Fortinet hardware or have some questions you need answered? Check Out The Fortinet Guru Youtube Channel! Want someone else to deal with it for you? Get some consulting from Fortinet GURU!

Fortinet Single Sign On – FortiAuthenticator 4.0

Fortinet Single Sign-On

FSSO is a set of methods to transparently authenticate users to FortiGate and FortiCache devices. This means that the FortiAuthenticator unit is trusting the implicit authentication of a different system, and using that to identify the user. FortiAuthenticator takes this framework and enhances it with several authentication methods:

  • Users can authenticate through a web portal and a set of embeddable widgets. l Users with FortiClient Endpoint Security installed can be automatically authenticated through the FortiClient SSO Mobility Agent.
  • Users authenticating against Active Directory can be automatically authenticated. l RADIUS Accounting packets can be used to trigger an FSSO authentication. l Users can be identified through the FortiAuthenticator API. This is useful for integration with third party systems.

The FortiAuthenticator unit must be configured to collect the relevant user logon data. After this basic configuration is complete, the various methods of collecting the log in information can be set up as needed.

Domain controller polling

When the FortiAuthenticator runs for the first time, it will poll the domain controller (DC) logs backwards until either the end of the log file or the logon timeout setting, whichever is reached first.

When the FortiAuthenticator is rebooted, the memory cache is written to the disk, then re-read at startup, allowing the previous state to be retained. Windows DC polling restarts on boot, then searches backwards in the DC log files until it reaches either the log that matches the last known serial number found in the login cache file, the log that is older than the last recorded read time, or the end of the log file, whichever is reached first.

The currently logged in FSSO users list is cached in memory and periodically written to disk. In an active-passive HA cluster, this file is synchronized to the slave device.

Windows management instrumentation polling

The FortiAuthenticator supports Windows Management Instrumentation (WMI) polling to detect workstation log off. This validates the currently logged on user for an IP address that has been discovered by the DC polling detection method.

Remote WMI access requires that the related ports are opened in the Windows firewall, and access to a domain account that belongs to the Domain Admin group.

To open ports in the Windows firewall in Windows 7, run gpedit.msc, go to Computerconfiguration >

Administrative Templates > Network > Network Connections > Windows Firewall > Domain Profile, go to Allow remote admin exception, then enable remote admin exception and, if necessary, configure an IP subnet/range.


General settings

General settings

The FortiAuthenticator unit listens for requests from authentication clients and can poll Windows Active Directory servers.

To configure FortiAuthenticator FSSO polling:

  1. Go to Fortinet SSO Methods > SSO > General to open the Edit SSO Configuration The Edit SSO Configuration window contains sections for FortiGate, FSSO, and user group membership.
  2. In the FortiGate section, configure the following settings:
Listening port Leave at 8000 unless your network requires you to change this. Ensure this port is allowed through the firewall.
Enable authentication Select to enable authentication, then enter a secret key, or password, in the Secret key field.
Login Expiry The length of time, in minutes, that users can remain logged in before the system logs them off automatically. The default is 480 minutes (8 hours).
Extend              user             session beyond logoff by The length of time, in seconds, that a user session is extended after the user logs off, from 0 (default) to 3600 seconds.
Enable NTLM

authentication

Select to enable NTLM authentication, then enter the NETBIOS or DNS name of the domain that the login user belongs to in the Userdomain field.
  1. In the Fortinet Single Sign-On (FSSO) section, configure the following settings:
Maximum concurrent user sessions Enter the maximum number of concurrent FSSO login sessions a user is allowed to have. Use 0 for unlimited.

Select Configure Per User/Group to configure the maximum number of concurrent sessions for each user or group. See Fine-grained controls on page 112.

Log Level Select one of Debug, Info, Warning, or Error as the minimum severity level of events to log from the drop- down list.

Select Download all logs to download all FSSO logs to your management computer.

General settings

Enable       Windows         Active

Directory domain controller polling

Select             to             enable             Windows             AD             polling.

Select to enable polling additional logon events, including from devices using Kerberos authentication or from Mac OS X systems, and from event IDs 672, 680, 4776, and 4768.

Enable polling additional logon events When additional active directory logon event IDs is enabled, event IDs 528, 540, and 4624 are also polled. These event are generated when a user attempts to access a domain service or resource. When a user logs off from the          workstation,         such      an          event     will         be               generated.

Enter the additional logon event timeout time in the Additional logon event timeout field, from 1 to 480 minutes, with 5 minutes being the default time.

Note: After a user logs off, their SSO session will stay active for the above configured period of time. During this time, if another user changes to the previous user’s IP address, they may be able to bypass the necessary authentication. For this reason, it is strongly recommended that the timeout time be kept short.

                     Enable         DNS

lookup to get IP

from workstation name

Select to use DNS lookup to get IP address information when an event contains only the workstation name.

This option is enabled by default.

Directly use domain DNS

suffix in lookup

Select to use the domain DNS suffix when doing a DNS lookup.

This option is disabled by default.

Enable  reverse DNS               lookup  to get         workstation name from IP Select to enable reverse DNS lookup. Reverse DNS lookup is used when an event contains only an IP address and no workstation name.

This option is enabled by default.

Do one more DNS lookup to get full list of IPs after reverse lookup of workstation name Reverse DNS lookup is used when an event contains only an IP address and no workstation name. Once the workstation name is determined, it is used in the DNS lookup again to get more complete IP address

information. This is useful in environments where workstations have multiple network interfaces.

This option is disabled by default.

Include     account name         ending

with $ (usually computer account)

Accounts that end in “$” used to exclusively denote computer accounts with

no actual user, but in some cases, valid accounts imported from dated systems can        feature  them.

This option is disabled by default.

Enable Radius Accounting SSO clients Select to enable the detection of users sign-ons and sign- offs from incoming RADIUS accounting (Start, Stop, and Interim-Update) records.
Use RADIUS realm as

Windows       Active

Directory domain

Select to use the RADIUS realm as the Windows AD domain.
Enable Syslog SSO Select to enable Syslog SSO.

General settings

Enable        FortiClient     SSO

Mobility Agent Service

Select to enable single sign-on (SSO) by clients running FortiClient Endpoint Security. For more information, see FortiClient SSO Mobility Agent on page 123.
FortiClient listening port Enter the FortiClient listening port number.
Enable authentication Select to enable authentication, then enter a secret key, or password, in the Secret key field.
Keep-alive interval Enter the duration between keep-alive transmissions, from 1 to 60 minutes. Default is 5 minutes.
Idle timeout Enter an amount of time after which to logoff a user if their status is not updated. The value cannot be lower than the Keep-alive interval value.
Enable NTLM Select to enable the NT LAN Manager (NTLM) to allow logon of users who are connected to a domain that does not have the FSSO DC Agent installed. Disable NTLM authentication only if your network does not support NTLM authentication for security or other reasons. Enter an amount of time after which NTLM authentication expires in the NTLM authentication expiry field, from 1 to 10080 minutes (7 days).
Enable hierarchical FSSO tiering Select to enable hierarchical FSSO tiering. Enter the collector listening port in the Collectorlistening port field.
Enable DC/TS Agent Clients Select to enable clients using DC or TS Agent. Enter the UDP port in the

DC/TS      Agent     listening     port     field.       Default       is          8002.

Select Enable authentication to enable authentication, then enter a secret key, or password, in the Secret key field.

Restrict             auto- discovered domain             controllers          to configured domain

controllers

Select to enable restricting automatically discovered domain controllers to already configured domain controllers only. See Domain controllers on page 114.
Enable       Windows         Active

Directory workstation IP

verification

Select to enable workstation IP verification with Windows Active Directory. If enabled, select Enable IP change detection via DNS lookup to detect IP changes via DNS lookup.
  1. In the UserGroup Membership section, configure the following settings:

General settings

Group cache mode Select the group cache mode:

Passive: Items have an expiry time after which the are removed and re-queried on the next logon.

Active: Items are periodically updated for all currently logged on users.

Group cache item

lifetime

Enter the amount of time after which items will expire (default = 480 minutes). This is only available when the group cache mode is set to Passive.
Do not use cached groups… Select to prevent using cached groups and to always load groups from server for the following SSO sources: l Windows Active Directory domain controller polling l RADIUS Accounting SSO l Syslog SSO

FortiClient SSO Mobility Agent l DC Agent l TS Agent

User login portal l SSO web service

Base distinguished names to search… Enter the base distinguished names to search for nesting of users or groups into cross domain and domain local groups.
  1. Select OK to apply the settings.

Having trouble configuring your Fortinet hardware or have some questions you need answered? Check Out The Fortinet Guru Youtube Channel! Want someone else to deal with it for you? Get some consulting from Fortinet GURU!

Port Based Network Access Control – FortiAuthenticator 4.0

Port-based Network Access Control

Port-based Network Access Control (PNAC), or 802.1X, authentication requires a client, an authenticator, and an authentication server (such as a FortiAuthenticator device).

The client is a device that wants to connect to the network. The authenticator is simply a network device, such as a wireless access point or switch. The authentication server is usually a host that supports the RADIUS and EAP protocols.

The client is not allowed access to the network until the client’s identity has been validated and authorized. Using 802.1X authentication, the client provides credentials to the authenticator, which the authenticator forwards to the authentication server for verification. If the authentication server determines that the credentials are valid, the client device is allowed access to the network.

FortiAuthenticator supports several IEEE 802.1X EAP methods.

EAP

The FortiAuthenticator unit supports several IEEE 802.1X EAP methods. These include authentication methods most commonly used in WiFi networks.

EAP is defined in RFC 3748 and updated in RFC 5247. EAP does not include security for the conversation between the client and the authentication server, so it is usually used within a secure tunnel technology such as TLS, TTLS, or MS-CHAP.

The FortiAuthenticator unit supports the following EAP methods:

Method Server Auth Client Auth Encryption Native OS Support
PEAP (MSCHAPv2) Yes Yes Yes Windows XP, Vista, 7
EAP-TTLS Yes No Yes Windows Vista, 7
EAP-TLS Yes Yes Yes Windows (XP, 7), Mac OS X, iOS,

Linux, Android

EAP-GTC Yes Yes Yes None (external supplicant required)

In addition to providing a channel for user authentication, EAP methods also provide certificate-based authentication of the server computer. EAP-TLS provides mutual authentication: the client and server authenticate each other using certificates. This is essential for authentication onto an enterprise network in a BYOD environment.

For successful EAP-TLS authentication, the user’s certificate must be bound to their account in Authentication >

UserManagement > Local Users (see Local users on page 58) and the relevant RADIUS client in Authentication > RADIUS Service > Clients (see RADIUS service on page 91) must permit that user to authenticate. By default, all local users can authenticate, but it is possible to limit authentication to specified user groups.

Port-based Network Access Control                                                                                                          EAP

The FortiAuthenticator unit and EAP

A FortiAuthenticator unit delivers all of the authentication features required for a successful EAP-TLS deployment, including:

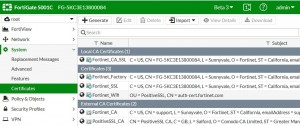
  • Certificate Management: create and revoke certificates as a CA. See Certificate Management on page 132.
  • Simple Certificate Enrollment Protocol (SCEP) Server: exchange a Certificate Signing Request (CSR) and the resulting signed certificate, simplifying the process of obtaining a device certificate.

FortiAuthenticator unit configuration

To configure the FortiAuthenticator unit, you need to:

  1. Create a CA certificate for the FortiAuthenticator unit. See Certificate authorities on page 140.

Optionally, you can skip this step and use an external CA certificate instead. Go to Certificate Management > Certificate Authorities > Trusted CAs to import CA certificates. See Trusted CAs on page 147.

  1. Create a server certificate for the FortiAuthenticator unit, using the CA certificate you created or imported in the preceding step. See End entities on page 133.
  2. If you configure EAP-TTLS authentication, go to Authentication > RADIUS Service > EAP and configure the certificates for EAP. See Configuring certificates for EAP on page 102.
  3. If SCEP will be used:
    1. Configure an SMTP server to be used for sending SCEP notifications. Then configure the email service for the administrator to use the SMTP server that you created. See E-mail services on page 46.
    2. Go to Certificate Management > SCEP > General and select Enable SCEP. Then select the CA certificate that you created or imported in Step 1 in the Default CA field and select OK. See SCEP on page 147.
  4. Go to Authentication > Remote Auth. Servers > LDAP and add the remote LDAP server that contains your user database. See LDAP on page 88.
  5. Import users from the remote LDAP server. You can choose which specific users will be permitted to authenticate. See Remote users on page 65.
  6. Go to Authentication > RADIUS Service > Clients to add the FortiGate wireless controller as an authentication client. Be sure to select the type of EAP authentication you intend to use. See RADIUS service on page 91.

Configuring certificates for EAP

The FortiAuthenticator unit can authenticate itself to clients with a CA certificate.

  1. Go to Certificate Management > Certificate Authorities > Trusted CAs to import the certificate you will use. See Trusted CAs on page 147.
  2. Go to Authentication > RADIUS Service > EAP.
  3. Select the EAP server certificate from the EAP ServerCertificate drop-down list.
  4. Select the trusted CAs and local CAs to use for EAP authentication from their requisite lists.
  5. Select OK to apply the settings.

Configuring switches and wireless controllers to use 802.1X authentication

The 802.1X configuration will be largely vendor dependent. The key requirements are:

Device self-enrollment                                                                           Port-based Network Access Control

l RADIUS Server IP: This is the IP address of the FortiAuthenticator l Key: The preshared secret configured in the FortiAuthenticator authentication client settings l Authentication Port: By default, FortiAuthenticator listens for authentication requests on port 1812.

Device self-enrollment

Device certificate self-enrollment is a method for local and remote users to obtain certificates for their devices. It is primarily used in enabling EAP-TLS for BYOD. For example:

l A user brings their tablet to a BYOD organization. l They log in to the FortiAuthenticator unit and create a certificate for the device. l With their certificate, username, and password they can authenticate to gain access to the wireless network. l Without the certificate, they are unable to access the network.

To enable device self-enrollment and adjust self-enrollment settings, go to Authentication > Self-service Portal > Device Self-enrollment and select Enable userdevice certificate self-enrollment.

SCEP enrollment template Select a SCEP enrollment template from the drop-down list. SCEP can be configured in Certificate Management > SCEP. See SCEP on page 147 for more information.
Max. devices Set the maximum number of devices that a user can self-enroll.
Key size Select the key size for self-enrolled certificates (1024, 2048, or 4096 bits).

iOS devices only support two key size: 1024 and 2048.

Enable self-enrollment for Smart Card certificate Select to enable self-enrollment for smart card certificates.

This requires that a DNS domain name be configured, as it is used in the CRL Distribution Points (CDPs) certificate extension.

Port-based Network Access Control                                                                          Non-compliant devices

Select OK to apply any changes you have made.

Non-compliant devices

802.1X methods require interactive entry of user credentials to prove a user’s identity before allowing them access to the network. This is not possible for non-interactive devices, such as printers. MAC Authentication Bypass is supported to allow non-802.1X compliant devices to be identified and accepted onto the network using their MAC address as authentication.

This feature is only for 802.1X MAC Authentication Bypass. FortiGate Captive Portal MAC Authentication is supported by configuring the MAC address as a standard user, with the MAC address as both the username and password, and not by entering it in the MAC Devices section.

Multiple MAC devices can be imported in bulk from a CSV file. The first column of the CSV file contains the device names (maximum of 50 characters), and the second column contains the corresponding MAC addresses (0123456789AB or 01:23:45:67:89:AB).

To configure MAC-based authentication for a device:

  1. Go to Authentication > User Management > MAC Devices. The MAC device list will be shown.
  2. If you are adding a new device, select Create New to open the Create New MAC-based Authentication Device

If you are editing an already existing device, select the device from the device list.

  1. Enter the device name in the Name field, and enter the device’s MAC address in the MAC address
  2. Select OK to apply your changes.

To import MAC devices:

  1. In the MAC device list, select Import.
  2. Select Browse to locate the CSV file on your computer.
  3. Select OK to import the list.

The import will fail if the maximum number of MAC devices has already been reached, or if any of the information contained within the file does not conform, for example if the device name too long, or there is an incorrectly formatted MAC address.


Having trouble configuring your Fortinet hardware or have some questions you need answered? Check Out The Fortinet Guru Youtube Channel! Want someone else to deal with it for you? Get some consulting from Fortinet GURU!

FortiAuthenticator 4.0 Setup

Setup

For information about installing the FortiAuthenticator unit and accessing the CLI or GUI, refer to the Quick Start Guide provided with your unit.

This chapter provides basic setup information for getting started with your FortiAuthenticator device. For more detailed information about specific system options, see System on page 23.

The following topics are included in this section:

  • Initial setup l Adding a FortiAuthenticator unit to your network l Maintenance l CLI commands
  • Troubleshooting

Initial setup

The following section provides information about setting up the Virtual Machine (VM) version of the product.

FortiAuthenticator VM setup

Before using FortiAuthenticator-VM, you need to install the VMware application to host the FortiAuthenticator-VM device. The installation instructions for FortiAuthenticator-VM assume you are familiar with VMware products and terminology.

System requirements

For information on the FortiAuthenticator-VM system requirements, please see the product datasheet available at http://www.fortinet.com/products/fortiauthenticator.

FortiAuthenticator-VM has kernel support for more than 4GB of RAM in VM images. However, this support also depends on the VM player version. For more information, see: http://kb.vmware.com/selfservice/microsites/search.do?language=en_

US&cmd=displayKC&externalId=1014006

The default Hardware Version is 4 to support the widest base of VM players. However you can modify the VM Hardware Version by editing the following line in the FortiAuthenticator-VM.vmx file:

virtualHW.version = “4”

FortiAuthenticator-VM image installation and initial setup

The following procedure describes setup on VMware Fusion.


Initial setup

To set up the FortiAuthenticator VM image:

  1. Download the VM image ZIP file to the local computer where VMware is installed.
  2. Extract the files from the zip file into a folder.
  3. In your VMware software, go to File > Open.
  4. Navigate to the expanded VM image folder, select the FortiAuthenticator-VM.vmx file, and select Open. VMware will install and start FortiAuthenticator-VM. This process can take a minute or two to complete.
  5. At the FortiAuthenticator login prompt, enter admin and press Enter.
  6. At the password prompt, press Enter. By default, there is no password.
  7. At the CLI prompt enter the following commands:

set port1-ip 192.168.1.99/24 set default-gw 192.168.1.2

Substitute your own desired FortiAuthenticator IP address and default gateway.

You can now connect to the GUI at the IP address you set for port 1.

Suspending the FortiAuthenticator-VM can have unintended consequences. Fortinet recommends that you do not use the suspend feature of VMware. Instead, shut down the virtual FortiAuthenticator system using the GUI or CLI, and then shut down the virtual machine using the VMware console.

Administrative access

Administrative access is enabled by default on port 1. Using the GUI, you can enable administrative access on other ports if necessary.

To add administrative access to an interface:

  1. Go to System > Network > Interfaces and select the interface you need to add administrative access to. See Interfaces on page 30.
  2. In Admin access, select the types of access to allow.
  3. Select OK.
GUI access

To use the GUI, point your browser to the IP address of port 1 (192.168.1.99 by default). For example, enter the following in the URL box:

https://192.168.1.99

Enter admin as the UserName and leave the Password field blank.

HTTP access is not enabled by default. To enable access, use the set ha-mgmtaccess command in the CLI (see CLI commands on page 19), or enable HTTP access on the interface in the GUI (see Interfaces on page 30).

For security reasons, the host or domain names that the GUI responds to are restricted. The list of trusted hosts is automatically generated from the following:

Adding a FortiAuthenticator unit to your network

l Configured hostname l Configured DNS domain name l Network interface IP addresses that have HTTP or HTTPS enabled l HA management IP addresses

Additional IP addresses and host or domain names that the GUI responded to can be defined in the GUI Access settings. See GUI access on page 34

Telnet

CLI access is available using telnet to the port1 interface IP address (192.168.1.99 by default). Use the telnet -K option so that telnet does not attempt to log on using your user ID. For example:

$ telnet -K 192.168.1.99

At the FortiAuthenticator login prompt, enter admin. When prompted for password press Enter. By default there is no password. When you are finished, use the exit command to end the telnet session.

CLI access using Telnet is not enabled by default. To enable access, use the set ha-mgmt-access command in the CLI (see CLI commands on page 19), or enable Telnet access on the interface in the GUI (see Interfaces on page 30)

SSH

SSH provides secure access to the CLI. Connect to the port1 interface IP address (192.168.1.99 by default). Specify the user name admin or SSH will attempt to log on with your user name. For example:

$ ssh admin@192.168.1.99

At the password prompt press Enter. By default there is no password. When you are finished, use the exit command to end the session.


Having trouble configuring your Fortinet hardware or have some questions you need answered? Check Out The Fortinet Guru Youtube Channel! Want someone else to deal with it for you? Get some consulting from Fortinet GURU!