Category Archives: FortiWAN

Set DNS server to FortiWAN

Set DNS server to FortiWAN

As an edge router, FortiWAN connects the external and internal networks to provide necessary valuable functions for incoming and outgoing service accesses. Among the functions, domain name resolution plays an important role for service accesses. The following is an overview about the DNS deployment on FortiWAN, according to source of the DNS query.

Set DNS server to FortiWAN

For external users who want to access your domain

If you provide network services (such as HTTP, FTP or SMTP) to Internet, no matter how you deploy the servers (deploy them in DMZ or LAN) you will need also provide the resolution of your domain name to users who want to access your services from Internet. You may manage your domain simply by a DNS hosting or FortiWAN’s Multihoming (See “Multihoming”). Multihoming is basically a DNS server providing standard name resolution to Internet users, moreover it provides load balancing and fail over to inbound traffic.

For internal users who want to access internal or external servers

It requires a DNS server for any user to resolve a external domain he want to access through Internet. Usually, this DNS server could be a ISP’s DNS server or any registered public DNS server. An user can configure the setting of DNS server on its own computer manually or automatically be allocated by DHCP. This DNS server is also necessary to FortiWAN itself for some operations. Several FortiWAN’s functions, such as sending logs and

notifications, ping and traceroute commands, require DNS resolution if the target is a FQDN (fully qualified domain name). Through Web UI System > Network Setting > DNS Server, you can manually set the DNS server to FortiWAN. FortiWAN’s DHCP (also SLAAC and DHCPv6, see “Automatic addressing within a basic subnet”) allocate the DNS servers set here to users in LAN or DMZ subnet if the users’ computers are set to automatically get DNS by DHCP.

On the other hand, if you want to maintain an internal DNS server in your site, FortiWAN provides Internal DNS

(see “Internal DNS”) for managing your domain to internal users (the users in LAN or DMZ subnet). An user in

LAN or DMZ subnet need to manually configure the DNS server on his computer for using the FortiWAN’s Internal

DNS (set DNS server as IP address of the gateway he connects to). It is unable to automatically allocate FortiWAN’s internal DNS to users by FortiWAN’s DHCP. The Internal DNS is recursive, which allows users to resolve other people’s domains (external domains). The DNS servers set here (System > Network Setting > DNS Server) will be asked by Internal DNS while it recursively resolve an unknown domain. Of cause that you can also set up a standalone internal DNS server to manage your domain for internal users, but this is the category of FortiWAN.

The last feature about DNS that FortiWAN provides is DNS Proxy, which is a mechanism to redirect outgoing DNS queries to other DNS servers according to WAN links loading. This is not the well-known DNS proxy, but is a solution for ISP peering issue (See “DNS Proxy” and “Optimum Route Detect”).

Back to System > Network Setting > DNS Server, it enables administrators to define the host name the FortiWAN in the network, the IPv4/IPv6 address of domain name servers used by FortiWAN, and the suffix of the domain name. The following is the list of FortiWAN’s functions that might require the DNS servers set here.

System > Diagnostic Tools Ping and Trace (See “Diagnostic Tools”)
System > Date/Time Synchronize system time through NTP server (See “Setting the system time & date”)
Service > Internal DNS Recursively resolve an unknown domain (see “Internal DNS”)
Log > Control SMTP and FTP Server Settings (See “Log Control”)
Log > Notification SMTP Server Settings (See “Log Notification”)
CLI Ping and Traceroute Commands (See “Console Mode Commands”)
FQDN Maintain the FQDN mapping in system for supporting FQDN in management policies (See “Basic concept to configure via Web UI” in “Using the Web UI”).

Configure the setting

Hostname Name for this FortiWAN appliance.
IPv4 Domain Name Server IPv4 DNS servers for this FortiWAN itself to resolve unknown domains. The maximum of three IPv4 addresses is allowed. The DNS servers set here will be used in a top-down order, if the DNS request timed out.
IPv6 Domain Name Server IPv6 DNS servers for this FortiWAN itself to resolve unknown domains. The maximum of three IPv6 addresses is allowed. The DNS servers set here will be used in a top-down order, if the DNS request timed out.
Domain Name Suffix Primary domain suffix of this FortiWAN appliance.

Note: Incomplete DNS server configurations will not influence the performance of the functions listed above. Only IP address is necessary instead of the FQDN.


Having trouble configuring your Fortinet hardware or have some questions you need answered? Check Out The Fortinet Guru Youtube Channel! Want someone else to deal with it for you? Get some consulting from Fortinet GURU!

FortiWAN Configuring Network Interface (Network Setting)

Configuring Network Interface (Network Setting)

As an edge router of a network site, FortiWAN is supposed to operate with connected networks, the WAN, LAN and DMZ networks. FortiWAN must guarantee general communication among the connected networks (routing), and so that can provide the advanced load balancing and fault tolerance functions. To establish connectivity between FortiWAN and the networks, you need to complete the following basic network settings:

  1. Decide a FortiWAN’s network port for connecting the FortiWAN with the network. This network port can be a physical port, an aggregated, redundant or VLAN port. Whether it is a physical or logical port, you have to program it as what the type that the connected network is (WAN, LAN or DMZ). VLAN and Port Mapping is the configuration that you can create logical network ports (aggregated, redundant and VLAN ports) and define the port mapping to the physical and logical ports (see Configurations for VLAN and Port Mapping).
  2. Configure the basic IP network setting and static routing information to the network port for the connected network. The settings here are necessary for FortiWAN to guarantee basic communication among the connected networks, packets can be routed correctly between the networks. According to the type of connected network, settings are divided into:
    • WAN Setting (DMZ setting is included): WAN Settings is the major part to deploy FortiWAN in various types of WAN links (see Configuring your WAN).
    • WAN/DMZ Private Subnet: This includes settings for deploying private subnets to WAN/DMZ port (see WAN/DMZ Private Subnet).
    • LAN Private Subnet: This includes settings for deploying private subnets to LAN port (see LAN Private Subnet).

Generally speaking, a network site consists of a WAN link and a private LAN network at least. WAN Setting and LAN Private Subnet are the necessary configurations for FortiWAN to connect the internal and external networks.

Some of FortiWAN’s functions, such as system time synchronization, log push, ping and trace commands, require cooperating with external servers. When FortiWAN itself (localhost) communicates with those external servers, such as NTP, FTP, SMTP servers, an appropriate DNS server is required for domain name resolving.

Configuration of DNS Server is part of the basic network setting (see Set DNS server for FortiWAN).

Briefly, network setting of a FortiWAN contains the configurations of:

  1. DNS for FortiWAN’s localhost (DNS Server, see Set DNS server for FortiWAN)
  2. Network port programing (VLAN and Port Mapping, see Configurations for VLAN and Port Mapping)
  3. Individual network connected to FortiWAN and the relative routing information (WAN Setting, WAN/DMZ Private Subnet and LAN Private Subnet, see Configuring your WAN and DMZ, WAN/DMZ Private Subnet and LAN Private Subnet)

Having trouble configuring your Fortinet hardware or have some questions you need answered? Check Out The Fortinet Guru Youtube Channel! Want someone else to deal with it for you? Get some consulting from Fortinet GURU!

Console Mode Commands

Console Mode Commands

This section provides further details on the Console mode commands. Before logging onto serial console via HyperTerminal, please ensure the following settings are in place: Bits per second: 9600; Data bits: 8; Parity: None; Stop bits: 1; Flow control: None (See “Connecting to the Web UI and the CLI”).

Note that for some standard utilities such as tcpdump or traceroute, the options that are not listed here are not supported by FortiWAN.

help: Displays the help menu

help [COMMAND]

Show a list of console commands.

arp: Manipulate (add and delete entries) or display the IPv4 network neighbor cache.

arp [-i <port>] -a [<hostname>] arp [-i <port>] -e

arp -i <port> -s <hostname> <hw_addr> arp -i <port> -d <hostname>

-a [<hostname>]: Display the entries of the specified hostname. All the entries will be displayed if no hostname is specified. Hostnames will be displayed in alternate BSD style output format.

-e: Display entries in default (Linux) style.

-s <hostname> <hw_addr>: Manually create an ARP entry mapping for the host hostname with the hardware address hw_addr. This requires specifying a port via -i port.

-d <hostname>: Remove the entries for the specified host hostname. This requires specifying a port via -i port.

-i <port>: Specify an network interface (port) of FortiWAN to display, create or remove entries.

<port>: Specify an network interface (port) of FortiWAN in format port#, e.g. port1, port2 and etc.

<hostname>: Specify the target IP address or domain name.

<hw_addr>: Specify the MAC address.

Note: If domain name is to be used in the hostname parameter, the DNS Server must be set in the Web UI [System]->[Network Settings]->[DNS Server].

arping: Discover and prob hosts on a network by sending ARP requests

arping <hostname> <link> <index>

Send an ARP request to ask the MAC address of an IP address and display the result.

<hostname>: Specify the target IP address or domain name (MAC address is not supported). Note that domain name is valid only if parameter <link> is specified as “wan”.

<link>: Specify the link or ports that the ARP request is sent through. The valid values are “wan”, “dmz” and “lan”.

<index>: Specify the index of a WAN link if <link> is specified as “wan”. The valid values are 1, 2, 3, …,etc. Example:

arping 192.168.2.100 lan will send an ARP request through LAN ports to ask the MAC address of host 192.168.2.100.

arping 10.10.10.10 wan 1 will send an ARP request through WAN link 1 to ask the MAC address of host

10.10.10.10.

Note: If domain name is to be used in the hostname parameter, the DNS Server must be set in the Web UI [System]->[Network Settings]->[DNS Server].

diagnose: Get diagnostic information of FortiWAN hardware

diagnose hardware deviceinfo cpu diagnose hardware deviceinfo disk diagnose hardware deviceinfo mem diagnose hardware deviceinfo nic

Get information of FortiWAN’s CPU, disk, memory and network interface controllers (NICs).

diagnose hardware ethtool

Display and change parameters of the network interface controllers (NICs) of FortiWAN by the standard Linux utility ethtool (V3.7). Execute diagnose hardware ethtool -h to get a short help message.

diagnose hardware lspci

Get information about PCI buses in FortiWAN system and the devices connected to them.

diagnose hardware smartctl

Control and monitor the storage system of FortiWAN by the standard utility smartctl (V6.3). Execute diagnose hardware smartctl -h to get a help message or refer to https://www.smartmontools.org for details.

disablefw: Disable all the firewall rules

disablefw

Disable all the configured firewall rules to allow any traffic accessing or passing through FortiWAN. This command rescues Web UI accessing from being inadvertently locked by incorrect firewall rules deployment. System will re-confirm, press [y] to proceed or [n] to cancel.

enforcearp: Force FortiWAN’s surrounding machines to update their ARP tables

enforcearp

Sytem will send gratuitous ARP packets to update their ARP tables. This is for cases where after the initial installation of FortiWAN, machines or servers sitting in the DMZ are unable to be able to connect to the internet.

export: Display configurations of NAT, Multihoming and Virtual Server

export <config_name>

Display the configurations of FortiWAN’s NAT, Multihoming and Virtual Server in the command line interface. You can export the configurations by copying the displayed content to a text file.

<config_name>: Specify the configuration to be displayed. Values of the parameter are nat, multihoming and virtual-server for options.

get: Get the version and serial number information of a FortiWAN apparatus

get sys status

Display the firmware version, serial number and BIOS version of the FortiWAN apparatus.

httpctl: Control the web server that Web UI is running on

httpctl restart httpctl showport httpctl setport <port>

System will restart the web server running on FortiWAN for the Web UI, or display the port number occupied by the web server, or specify port number to the web server. restart: Restart the web server. showport: Display the port number that web server is listening. setport: Set the port number for the web server with indicating parameter port.

<port>: Specify the port number for setport.

import: Import the configurations of NAT, Multihoming and Virtual Server

import

Type import [Enter] to import the configurations of NAT, Multihoming and Virtual Server to FortiWAN. You have to manually input the configuration in text after the command prompt “import>” line by line.

Example:

> import

Please enter configuration. terminate with a line constaining exactly: 1) ‘apply’ to apply, or 2) ‘abort’ to abort. import> nat { import> wan-array { import> wan@1 { import> rule-array { import> rule { #1 import> source 10.10.10.55-10.10.10.77 import> destination 10.12.10.55-10.12.10.70 import> translated 10.12.104.232 import> } import> } import> } import> } import> } import> apply

Start to apply configuration of nat…

Settings are applied for page Service -> Nat >

Type abort in command prompt import> to leave the prompt any time. Please refer to the exported configurations (displayed by command export or saved via Web UI. See “Configuration File” in “Administration”) for the import format.

init_reports_db: Set Reports database to factory default

init_reports_db

Set FortiWAN’s Reports database to factory default. All the report data will be deleted. Please make sure the database is backed up if it is necessary (See Reports Database Tool and Database Data Utility). Note that executing this command will bring system an automatic reboot.

jframe: Enable jumbo frames to support specified MTU size for FortiWAN’s LAN ports

jframe show

Get the port number and the MTU size of FortiWAN’s LAN ports jframe set <port> <mtu>

Enable jumbo frames on the LAN port by specifying a MTU size that is larger than 1500.

<port>: The port# of LAN port, such as port1, port2…and etc.

<mtu>: The MTU size.

Note that applying for Network Setting resets the MTU on LAN ports to 1500.

logout: Exit Console mode

logout

Exit the Console mode. The system will re-confirm, press [y] to proceed or [n] to cancel.

ping: Test network connectivity

ping <hostname> <link> <index>

Ping a HOST machine to detect the current WAN link status. HOST is the machine/device to be pinged. The LINK parameter can be WAN, LAN or DMZ. If the LINK is WAN then also specify the WAN port number.

<hostname>: The parameter in specifying the target IP address or domain name. Note that domain name is valid only if parameter <link> is specified as “wan”.

<link>: The parameter in specifying the link or ports that the ICMP PING REQUEST packets are sent through. The valid values are “wan”, “dmz” and “lan”.

<index>: The parameter in specifying the index of a WAN link if <link> is specified as “wan”. The valid values are 1, 2, 3, …,etc. (0 for private subnet).

Example:

ping www.hinet.net wan 1 to ping www.hinet.net via WAN #1.

Note: If domain name is used in the hostname parameter, DNS Server must be set in the Web UI [System]-> [Network Settings]->[DNS Server] (See “Set DNS server for FortiWAN”).

For more on ICMP related error messages please refer to other ICMP/PING materials.

reactivate: Reactivate the FortiWAN apparatus

reactivate

Reactivating the FortiWAN apparatus will:

  • Reset all system configurations to factory default (See “Appendix A: Default Values” for the details) l Return the system to base-bandwidth (See “License Control” in “Administration”) l Reset Reports database to factory default. All the report data will be deleted.

Using this command will result in all system data being deleted as well as all bandwidth licenses. Before you attempt a reactivation, please make sure the following are complete:.

  • Backup any configuration data (See “Configuration File” in “Administration”). l Backup Reports database (See “Reports Database Tool”).
  • Locate your Bandwidth Upgrade Key if your system is not at base bandwidth, so that the bandwidth license the system had before can be activated by reentering the key.

Note that if your system is not at base bandwidth and you do not have your Bandwidth Upgrade Keys, please contact Fortinet CSS before attempting a reactivation.

reboot: Restart FortiWAN

reboot [-t <second>]

Restart FortiWAN immediately or restart it after a time period.

-t: Reboot FortiWAN after seconds. Parameter second is for this.

<second>: The parameter in specifying the time period (in second) system waits for to reboot.

Example: reboot -t 5 to restart the system after 5 seconds.

resetconfig: Reset system configurations to factory defaults

resetconfig

resetconfig <ip_address/netmask<@port>>

resetconfig <ip_address/netmask<@port>> <network_ip/netmask@gateway_ip>

Reset system configurations to factory default. This will delete all system settings including accounts of Web UI, network settings and all the other system settings and service settings (See “Appendix A: Default Values” for the details). Please backup all the configurations (See “Configuration File” in “Administration”) before executing this command. This command makes no changes to Reports database and bandwidth license, as opposed to command reactivate.

Since command resetconfig will return IP address of LAN and WAN ports to the default values such as 192.168.0.1/255.255.255.0, 192.168.1.1/255.255.255.0 and 192.168.2.1/255.255.255.0, users might need to change the IP address of their local computer to reconnect to the Web UI via the LAN or WAN port (See “Connecting to the Web UI and the CLI”). Note that resetconfig resets the port mappings to factory default, please connect to the correct network port (LAN or WAN) for accessing to Web UI (see Network interfaces and port mapping).

resetconfig provides two optional parameters, ip_address/netmask and @port, to specify a LAN port address and a LAN port mapping (map the LAN port to the specified physical port) while resetting the configurations. All the configurations will be reset to factory default and the LAN settings will be configured to the specified value, so that users can reconnect to Web UI via this port without changing network topology. Furthermore, a static routing entry can be specified to the FortiWAN appliance, so that you can access Web UI across subnets.

System will re-confirm, press [y] to proceed or [n] to cancel.

<ip_address/netmask<@port>>: The parameter in specifying the network configuration ip_ address/netmask to network port @port. The network configuration will be assigned to LAN port by default if parameter @port is not specified.

<network_ip/networkmask@gateway_ip>: The parameter in specifying the static routing entry.

Example:

Considering that the LAN port of a FortiWAN 200B appliance is mapped to the first physical port (port1), IP address 192.168.100.1/255.255.255.0 is assigned to the LAN port and a static routing rule is created to route packets destined to 192.168.200.0/255.255.255.0 to 192.168.100.254. Administrators in

192.168.100.0/255.255.255.0 and 192.168.200.0/255.255.255.0 can access Web UI via the LAN port. Here are the usages of command resetconfig in different ways:

Type “resetconfig [IP address/Netmask]” to specify IP configuration to LAN port from resetting system to factory default.

  • resetconfigresets all the configurations to factory default including LAN settings. In the default port mapping, port1 is mapped to WAN and port4 is mapped to LAN. IP address of the LAN port returns to

192.168.0.1/255.255.255.0. Administrators in 192.168.100.0/255.255.255.0 and 192.168.200.0/255.255.255.0 can not access to Web UI until appropriate changes to cable installation and network topology are done manually.

  • resetconfig 192.168.100.1/255.255.255.0 resets system to factory default, but set

192.168.100.1/255.255.255.0 to LAN port. However, without a specifying, port1 is mapped to WAN and port4 is mapped to LAN by default. Besides, the static routing rule for responding access requests coming from 192.168.200.0/255.255.255.0 is deleted as well. Therefore, it still requires manual changes to cable installation and network topology for administrators in 192.168.100.0/255.255.255.0 and 192.168.200.0/255.255.255.0 can access the Web UI.

  • resetconfig 192.168.100.1/255.255.255.0@port1 resets system to factory default, but map port1 to LAN and set 192.168.100.1/255.255.255.0 to the LAN port. Administrators in 192.168.100.0/255.255.255.0 can access Web UI via the LAN port without any change, but administrators in 192.168.200.0/255.255.255.0 can not access the Web UI until a correct routing rule is created.
  • resetconfig 192.168.100.1/255.255.255.0@port1

192.168.200.0/255.255.255.0@192.168.100.254 resets system to factory default, but map port1 to

LAN, set 192.168.100.1/255.255.255.0 to the LAN port and create a routing rule for packets destined to

192.168.200.0/255.255.255.0, where 192.168.100.254 is the router connecting subnets

192.168.100.0/255.255.255.0 and 192.168.200.0/255.255.255.0. Administrators in 192.168.100.0/255.255.255.0 and 192.168.200.0/255.255.255.0 so that can access Web UI via the LAN port without any change to network deployment.

Note that executing resetconfig without specifying the LAN port settings will reset port mapping to factory default, which implies the WAN links assigned to the default WAN ports are enabled. However, except the LAN port, there will be not port mappings set for WAN and DMZ if resetconfig is executed with specifying any parameter. In the case, there will be not default WAN and DMZ ports available (no default WAN links neither) after resetconfig, administrators have to re-login to Web UI via the LAN port to set the port mappings (see Connecting to the Web UI ).

resetpasswd: Reset FortiWAN’s Administrator and Monitor passwords to factory default

resetpasswd

System will re-confirm, press [y] to proceed or [n] to cancel.

setupport: Configure the transmission mode for all the FortiWAN port(s)

setupport show setupport change <port> auto setupport change <port> <speed> <mode>

show: Show the current transmission modes for all the network ports.

change: Change the transmission mode of the specified port to AUTO or specified speed and mode.

<port>: The parameter in specifying the port number. The valid values are 1, 2, 3, …,etc.

<speed>: The parameter in specifying the transmission speed. The valid values are 10, 100 and 1000.

<mode>: The parameter in specifying the transmission mode. The valid values are half and full.

Example:

setupport show setupport change 1 auto setupport change 2 100 full

Note:

Not all network devices support full 100M speed.

This command has no effect on fiber interface.

The port is the port number of the FortiWAN port interface; exact number varies according to product models.

shownetwork: Show the current status of all the WAN links available

shownetwork

Display WAN Type, Bandwidth, IP(s) on Local/WAN/DMZ, Netmask, Gateway, and WAN/DMZ Port.

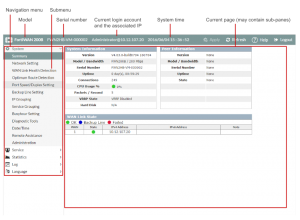
Note: This Console command can only show the current network status. This setting can be changed in the Web UI under “Network Settings” (See “Configuring Network Interface (Network Setting)”).

showtrstat: Display tunnel status

showtrstat [TR GROUP NAME]

Display the status of specified tunnel group.

shutdown: Shut the FortiWAN system down

shutdown

This is command is used to shut FortiWAN system down, all the system processes and services will be terminated normally. Note that this command might not power the appliance off, please turn on/off the power switch or plug/unplug the power adapter to power on/off the appliance. sslcert: Set or unset SSL certificate for FortiWAN WebUI

sslcert show | sslcert set

Type sslcert show to display current SSL certificate that FortiWAN WebUI is working with. The RSA private key will not be displayed here for security issue.

Type sslcert set to set new SSL certificate for working with FortiWAN WebUI. You have to manually input the SSL private key and its correspondent certificate in text after the command prompt sslcert> line by line.

The content inputted for the private key and certificate must start with “—–BEGIN CERTIFICATE—–” and “—-BEGIN RSA PRIVATE KEY—–”, and end with “—–END CERTIFICATE—–” and “—-END RSA PRIVATE KEY—–”.

Example:

> sslcert set

Please enter the certificate. It should starts with

—–BEGIN CERTIFICATE—-and end with

—–END CERTIFICATE—–

To abort please enter an empty line: sslcert> —–BEGIN CERTIFICATE—-sslcert> …(data encoded in base64)…

sslcert> —–END CERTIFICATE—–

Please enter the private key. It should starts with

—–BEGIN RSA PRIVATE KEY—-and end with

—–END RSA PRIVATE KEY—-To abort please enter an empty line: sslcert> —–BEGIN RSA PRIVATE KEY—-sslcert> …(data encoded in base64)… sslcert> —–END RSA PRIVATE KEY—–

>

Type sslcert reset to reset to factory default, the self-signed certificate.

sysctl: Controls the system parameters

sysctl

Display the values of the system parameters.

sysctl <parameter>=<value|default>

Set the system parameter with the specified value. The system parameters are as followings:

VoIP Related – [sip-helper] and [h323-helper]
sip-helper   h323-helper

sysctl sip-helper=<0|1|default> sysctl h323-helper=<0|1|default>

sip-helper: to enable [1] or disable [0] SIP application gateway modules. Type default to set it default, which is disabled.

h323-helper: to enable [1] or disable [0] H323 application gateway modules. Type default to set it default, which is disabled.

Example:

sysctl sip-helper=0 disables the SIP application gateway modules. sysctl sip-helper=default set the SIP application gateway modules to default, which is disabled.

Note: SIP and H323 application gateway modules execute NAT transparent for SIP and H323. For some SIP and H323 devices that NAT transparent is a built-in function, it is suggested to disable the SIP or H323 gateway module in FortiWAN.

ICMP Timeout Related – [icmp-timeout] and [icmpv6-timeout]
icmp-timeout   icmpv6-timeout

sysctl icmp-timeout=<value|default>

Set ICMP timeout, where <value> is the timeout in seconds. Type default to set the timeout to default value, which is 3 seconds.

sysctl icmpv6-timeout=<value|default>

Set ICMPv6 timeout, where <value> is the timeout in seconds. Type default to set the timeout to default value, which is 3 seconds.

TCP Timeout Related –
tcp-timeout-close tcp-timeout-close-wait tcp-timeout-established
tcp-timeout-fin-wait tcp-timeout-last-ack tcp-timeout-max-retrans
tcp-timeout-syn-recv tcp-timeout-syn-sent tcp-timeout-time-wait
tcp-timeout-unacknowledged    

sysctl tcp-timeout-close=<value|default>

Set timeout for TCP connections in CLOSING state, where <value> is the timeout in seconds. Type default to set the timeout to default value, which is 10 seconds.

sysctl tcp-timeout-close-wait=<value|default>

Set timeout for TCP connections in CLOSE WAIT state, where <value> is the timeout in seconds. Type default to set the timeout to default value, which is 60 seconds.

sysctl tcp-timeout-established=<value|default>

Set timeout for TCP connections in ESTABLISHED state, where <value> is the timeout in seconds. Type default to set the timeout to default value, which is 43200 seconds.

sysctl tcp-timeout-fin-wait=<value|default>

Set timeout for TCP connections in FIN WAIT state where <value> is the timeout in seconds. Type default to set the timeout to default value, which is 120 seconds.

sysctl tcp-timeout-last-ack=<value|default>

Set timeout for TCP connections in LAST ACK state, where <value> is the timeout in seconds. Type default to set the timeout to default value, which is 30 seconds.

sysctl tcp-timeout-max-retrans=<value|default>

Set timeout for the TCP connections that reach three retransmission without receiving an acceptable ACK from destinations, where <value> is the timeout in seconds. Type default to set the timeout to default value, which is 300 seconds.

sysctl tcp-timeout-syn-recv=<value|default>

Set timeout for TCP connections in SYN RECV state, where <value> is the timeout in seconds. Type default to set the timeout to default value, which is 60 seconds.

sysctl tcp-timeout-syn-sent=<value|default>

Set timeout for TCP connections in SYN SENT state, where <value> is the timeout in seconds. Type default to set the timeout to default value, which is 120 seconds.

sysctl tcp-timeout-time-wait=<value|default>

Set timeout for TCP connections in TIME WAIT state, where <value> is the timeout in seconds. Type default to set the timeout to default value, which is 60 seconds.

sysctl tcp-timeout-unacknowledged=<value|default>

Set timeout for the segments that receive no acceptable ACKs from destinations, where <value> is the timeout in seconds. Type default to set the timeout to default value, which is 300 seconds.

UDP Timeout Related
udp-timeout udp-timeout-stream

sysctl udp-timeout=<value|default>

Set UDP timeout, where <value> is the timeout in seconds. Type default to set the timeout to default value, which is 30 seconds.

sysctl udp-timeout-stream=<value|default>

Set UDP stream timeout, where <value> is the timeout in seconds. Type default to set the timeout to default value, which is 180 seconds.

Other Timeout
frag6-timeout generic-timeout

sysctl frag6-timeout=<value|default>

Set timeout to keep an IPv6 fragment in memory, where <value> is the timeout in seconds. Type default to set the timeout to default value, which is 60 seconds sysctl generic-timeout=<value|default>

Set generic timeout for layer 4 unknown/unsupported protocols, where <value> is the timeout in seconds. Type default to set the timeout to default value, which is 600 seconds.

Tunnel Routing Related – [generic-receive-offload-<port>]

generic-receive-offload-<port>

sysctl generic-receive-offload-<port>=<0|1|default>

Disabling GRO (General Receive Offload) mechanism on the corresponding LAN ports and/or DMZ ports of a Tunnel Routing network can enhance the Tunnel Routing transmission performance (see How the Tunnel Routing Works and How to set up routing rules for Tunnel Routing).

generic-receive-offload-<port>: Enable [1] or disable [0] GRO (General Receive Offload) mechanism on the specified physical network interface <port>, where <port> is a variable. Type default to set the GRO on <port> to default, which is enabled.

<port>: Specify an network interface (port) of FortiWAN in format port#, e.g. port1, port2 and etc.

Example:

sysctl generic-receive-offload-port1=0 disables GRO mechanism on network interface port1.

sysctl generic-receive-offload-port2=default set GRO mechanism on network interface port2 to default, which is enabled.

Note that disabling GRO module on a network port can enhance the Tunnel Routing transmission performance on the port, but it also results in slight impact to non-Tunnel-Routing transmission on the port when the system is under heavy loading (there might be a slight decrease in transmission performance of non-Tunnel-Routing traffic through the network port). We suggest keeping GRO modules enabled on the network ports that does not participate in the Tunnel Routing transmission.

sysinfo: Display usage FortiWAN’s CPU, memory and disk

sysinfo

Get the usage of FortiWAN’s CPU, memory and disk space in percentage.

tcpdump: Dump network traffic

tcpdump [-aAdDeflLnNOpqRStuUvxX] [-c count] [-E algo:secret] [-i PORT] [-s snaplen] [-T type] [-y datalinktype] [expression]

<port>: The parameter in specifying an network interface (port) of FortiWAN in format port#, e.g. port1, port2 and etc.

For details of the options and parameters, please refer to http://www.tcpdump.org/tcpdump_man.html. Note that options not listed here are not supported by FortiWAN.

traceroute: Shows the packet routes between FortiWAN’s port to a specified destination

traceroute <hostname> <link> <index>

Show the packet routes between FortiWAN’s ports to the hostname.

<hostname>: The parameter in specifying the target IP address or domain name. Note that domain name is valid only if parameter <link> is specified as “wan”.

<link>: The parameter in specifying the link or ports that the traceroute packets start from. The valid values are “wan”, “dmz” and “lan”.

<index>: The parameter in specifying the index of a WAN link if <link> is specified as “wan”. The valid values are 1, 2, 3, …,etc.

Example:

traceroute www.hinet.net wan 1 showes the trace routes from WAN link1 to www.hinet.net.

Note: If domain name is to be used in the hostname parameter, the DNS Server must be set in the Web UI [System]->[Network Settings]->[DNS Server] (See “Set DNS server for FortiWAN”).


Set DNS server to FortiWAN


Having trouble configuring your Fortinet hardware or have some questions you need answered? Check Out The Fortinet Guru Youtube Channel! Want someone else to deal with it for you? Get some consulting from Fortinet GURU!

FortiWAN Using The Web UI

Using the Web UI

Web UI Overview

Once you log in, you will see the operating page that is divided into three parts, the header is locate the upper side of the screen, the navigation menu is located on the left side of the screen, and the content pane is located on the center of the screen.

Header contains information and items which is unrelated to FortiWAN’s functions.

  • Current login account: Display the account you login as and the IP address you login from. l System Time: Display the FortiWAN’s system time.
  • Current operating page: Display the path (Main category > Page name) of the operating page displayed in Content Pane.
  • Apply: The button for applying configurations. Pages for only displaying information or statistics contains no Apply button.
  • Reload: The button for reloading current operating page. l Help: The button for getting the Help information of current operating page. l Logout: The button for logging out Web UI.

[System/Summary] shown above indicates page contents are displayed of [System] > [Summary], and [Administrator@125.227.251.80] indicates Administrator account log in from IP 125.227.251.80. Note that do not use your browser’s Back button to navigate, pages may not operate correctly.

Navigation Menu consists of six main categories: System, Service, Statistics, Log, Reports and Language. Each category contains sub-menu of individual functions. To expand a category, simply click it.To display the operating page of a function from a sub-menu, click the name of the function and it will display on the content pane.

  • System: Contains necessary items to maintain the FortiWAN; they are Summary, Network Setting, WAN Link

Health Detection, Optimum Route Detection, Port Speed/Duplex Setting, Backup Line Setting, IP Grouping,

Service Grouping, Busyhour Setting, Diagnostic Tools, Date/Time, Remote Assistance and Administration (See “System Configurations” and “Configuring Network Interface (Network Setting)”). Administration is not available to Monitor permission, it is invisible on the menu to a Monitor account.

  • Service: Contains the services the FortiWAN provides; they are Firewall, NAT, Persistent Routing, Auto Routing,

Virtual Server, Bandwidth Management, Connection Limit, Cache Redirect, Multihoming, Internal DNS, DNS Proxy, SNMP, IP-MAC Mapping and Tunnel Routing (See “Load Balancing & Fault Tolerance” & “Optional

Services”).

  • Statistics: Contains basic statistics of FortiWAN’s system, services and traffic; they are Traffic, BM, Persistent Routing, WAN Link Health Detection, Dynamic IP WAN Link, DHCP Lease Information, RIP & OSPF Status, Connection Limit, Virtual Server Status, FQDN, Tunnel Status and Tunnel Traffic (See “Statistics”).
  • Log: Contains managements of system logs; they are View, Control, Notification and Reports (See “Log”).
  • Reports: Contain the advanced analysis and long-term statistics of FortiWAN’s system, services and traffic; they are Bandwidth, CPU, Session, WAN Traffic, WAN Reliability, WAN Status, TR Reliability, TR Status, In Class, Out Class, WAN, Service, Internal IP, Traffic Rate, Connection Limit, Firewall, Virtual Server, Multihoming, Dashboard and Settings (See “Reports”).
  • Language: Support English, Traditional Chinese and Simplified Chinese for options to display Web UI in multiple languages,

Content Pane displays related items of a function specified from the left menu.

Multi-user Login

FortiWAN’s Web UI supports multiple sign-in. The maximum limit for users can log-in concurrently is 20 users, account permission (See “Administration\Administrator and Monitor Password”) insensitive. An user get failed to log-in if there have been 20 users in the Web UI concurrently. FortiWAN Web UI does not accept multiple login from the same host and the same browser. Users that attempt to login to Web UI via the same host and browser (different tabs or windows) will be logged out (including the one who is already in Web UI).

Configurations to FortiWAN applied concurrently via Web UI by the multiple users are arranged and processed in order (one by one). It takes time for system to complete every single configuration applying; therefore, when multiple configurations are in the queue to be applied, it might take a little extra time to wait for system getting previous applications complete for the users after clicking the Apply button. Configurations to different functions are queued up together to be applied. For example, an configuration to Auto Routing (made by user A) will be queued if a configuration to Multihoming (made earlier by user B) has being processed.

FortiWAN does not provide multi-thread to run concurrent Tunnel Routing Benchmark (See “Tunnel Routing Benchmark”). An alert displays to the users who try to start Tunnel Routing Benchmark Client\Server via WebUI if the Benchmark Client\Server is already running (started earlier by one user).

Basic concept to configure via Web UI

FortiWAN’s services (load balancing, fault tolerance and other optional services) are based on Policy and Filter. Policies (or called Classes as well) are specified items indicating different actions for a service. Policies are applied to different objects classified by the predefined filters. Basically, a object is classified by the combinations of When, Source, Destination and TCP/UDP/ICMP Service. A filter contains the settings of those items When, Source, Destination and Service, and also an associated Policy. Traffic that matches the filter will be applied to the specified policy.

The common operation buttons

FortiWAN manages most of its rules/filters/policies with top-down evaluation method where the rules are prioritized in descending order.

Click this button, to add a new rule below the current rule.

Click this button, to delete the rule.

Click this button, to move the rule up a row.

Click this button, to move the rule down a row.

Write a note for this rule.

The function is disabled.

The function is enabled.

This symbol indicates a default policy, rule or filter, which is unmodifiable and indelible.

Configuration on When

This is for filtering traffic by different time period which is predefined in “Busyhour Settings”.

Configuration on Source and Destination

This is for filtering the established sessions from/to specified source/destination. The options are:

IPv4/IPv6 Address         :     Matches sessions coming from or going to a single IPv4/IPv6 address. e.g. 192.168.1.4.

IPv4/IPv6 Range    :   Matches sessions coming from or going to a continuous range of IP addresses.

e.g. 192.168.1.10-192.168.1.20.

IPv4/IPv6 Subnet : Matches sessions coming from or going to a subnet. e.g.192.168.1.0/255.255.255.0.
WAN : Matches sessions coming from or going to WAN.
LAN : Matches sessions coming from or going to LAN.
DMZ : Matches sessions coming from or going to DMZ.
Localhost : Matches sessions coming from or going to FortiWAN.
Any Address : Matches all sessions regardless of its source or destination.
FQDN : Matches sessions coming from or going to FQDN.
IP Grouping Name : Matches sessions coming from or going to the IP addresses that predefined in IP groups (See “IP Grouping”).

Configuration on Input Port

This is for filtering the traffic coming from specified physical ports. Input Port are the item used to evaluate outbound traffic for only Auto Routing (See “Auto Routing”) so far. Ports (normal ports, VLAN ports, redundant LAN\DMZ ports and aggregated LAN\DMZ ports) defined in [Network Setting > VLAN and Port Mapping] (See “Configurations for VLAN and Port Mapping”) are listed for options:

Port X : Matches sessions coming from the specified normal port.
Port X.[VLAN Tag] : Matches sessions coming from the specified VLAN port.
LAN Bridge: [Lable] : Matches sessions coming from the specified redundant LAN port.
DMZ Bridge: [Lable] : Matches sessions coming from the specified redundant DMZ port.
LAN Bonding: [Lable] : Matches sessions coming from the specified aggregated LAN port.
DMZ Bonding: [Lable] : Matches sessions coming from the specified aggregated DMZ port.

Configuration on Service

This is for filtering the established sessions running specified service. It contains some well-known services for options and user-defined services (TCP@, UDP@ and Protocol#):

  • FTP (21) l SSH (22) l TELNET (23) l SMTP (25) l DNS (53) l GOPHER (70) l FINGER (79)
  • HTTP (80) l POP3 (110) l NNTP (119) l NTP (123) l IMAP (143) l SNMP (161) l BGP (179) l WAIS (210) l LDAP (389) l HTTPS (443) l IKE (500) l RLOGIN (513) l SYSLOG (514) l RIP (520) l UUCP (540) l H323 (1720) l RADIUS (1812) l RADIUS-ACCT (1813) l pcAnywhere-D (5631) l pcAnywhere-S (5632) l X-Windows (6000-6063)
  • GRE l ESP l AH l ICMP l TCP@ l UDP@
  • Protocol# l Any

Having trouble configuring your Fortinet hardware or have some questions you need answered? Check Out The Fortinet Guru Youtube Channel! Want someone else to deal with it for you? Get some consulting from Fortinet GURU!

FortiWAN Web UI and CLI Overview

Web UI and CLI Overview

FortiWAN provides the Web User Interface (Web UI) which is the primary interface for network deployments, administration, configurations and traffic statistics and analysis. FortiWAN’s Command Line interface (CLI) provides basic commands for trouble shooting and system recovery. This section starts with the steps to connect to FortiWAN’s Web UI and CLI while the first time using FortiWAN product. Afterward a basic and common concept about using Web UI is introduced.

Connecting to the Web UI and the CLI

Be aware that the position of LAN port may vary depending on models. FortiWAN-200B, for example, has five network interfaces, with its fourth interface as LAN port and fifth as DMZ port (see Network interfaces and port mapping).

Before setting up FortiWAN in your network, ensure the following are taken care of:

  • Check network environment and make sure the following are ready before FortiWAN installation and setup: wellstructured network architecture, and proper IP allocation.
  • Use cross-over to connect PC to FortiWAN LAN port instead of straight-through.

Default LAN port

FortiWAN’s LAN port (see Network interfaces and port mapping) is used to connect to a private LAN subnet and provides the access to the Web UI. The default subnet configured on LAN port is 192.168.0.0/255.255.255.0 and the localhost IP address is 192.168.0.1, which means you can connect to LAN port (192.168.0.1) from a management computer in the subnet 192.168.0.0/255.255.255.0 without changing network setting on LAN port. For example, connect directly a management computer that IP address/netmask is 192.168.0.10/255.255.255.0 to the LAN port.

For the first time accessing to the Web UI, you can get the connection via a computer matching with the default LAN subnet (See the section “Access via a computer that matches the default LAN IP address” below). However, the default subnet configured on LAN port might conflict with or be unreachable from your existing network, especially for the deployments of FortiWAN-VM. If you want to have the connection to LAN port from a subnet that does not match the default LAN IP address, such as an existing subnet 10.10.10.0/255.255.255.0, you have to change the network setting of LAN port via CLI to match the subnet (See the section “Access via a computer that does not match the default LAN IP address” below).

To connect to the Web UI

The default IP address of LAN port is 192.168.0.1 and the netmask is 255.255.255.0. For the first time accessing the Web UI, you can get the access via a computer connected directly to FortiWAN, or via a computer in a existing LAN subnet connected to FortiWAN.

Requires: Microsoft Internet Explorer 6, Mozilla Firefox 2.0, or Google Chrome 2.0 or newer.

Access via a computer that matches the default LAN IP address

  • Using the Ethernet cable, connect LAN port of the appliance to your computer. For a FortiWAN-VM appliance, connect your computer to the virtual network (vSwitch) of the LAN port of FortiWAN-VM appliance.
  • Switch on FortiWAN. It will emit 3 beeps, indicating the system is initialized and activated. Meanwhile, the LAN port LED blinks, indicating a proper connection.
  • By default, the LAN IP address is 192.168.0.1. Configure your computer to match the appliance’s default LAN subnet. For example, on Windows 7, click the Start (Windows logo) menu to open it, and then click Control Panel. Click Network and Sharing Center, Local Area Connection, and then the Properties button. Select Internet Protocol Version 4 (TCP/IPv4), then click its Properties button. Select Use the following IP address, then change your computer’s settings to:
  • IP address: 192.168.0.2 (or 192.168.0.X) l Subnet mask: 255.255.255.0
  • To connect to FortiWAN’s web UI, start a web browser and go to https://192.168.0.1. (Remember to include the “s” in https://.) l Login to web UI with the default username,admin, and leave the password field blank (case sensitive). Access via a computer that does not match the default LAN IP address
  • Connect to the CLI (See the section “To connect to the CLI” below).
  • Configure the network setting of LAN port to match the existing LAN subnet (See the section “Change network setting to LAN port via CLI” below).
  • After system reboots, connect the subnet to the LAN port of FortiWAN appliance.
  • To connect to FortiWAN’s web UI, start a web browser on a computer in the subnet and go to https://xxx.xxx.xxx.xxx, where xxx.xxx.xxx.xxx is the IP address assigned to LAN port. (Remember to include the “s” in https://.) l Login to web UI with the default username,admin, and leave the password field blank (case sensitive).

Note:

  1. Make sure the proxy settings of the web browser are disabled. For example, open Internet Explorer and select “Internet Option” on “Tools” menu. Click the “Connection” tab, “LAN settings” and open “Local Area Network Settings” dialog box, then disable “Proxy server”.
  2. Default account admin has the Administrator permission (See “Administration/Administrator and Monitor Password”). It is strong recommended to reset the passwords ASAP, and take good care of it.
  3. Web UI supports concurrent multiple sign-in (See “Using the Web UI/Multi-user Login”).
  4. The default Username/Password, Administrator/1234 and Monitor/5678, used for V4.0.x remain in this version, but will be removed in next version.
  5. FortiWAN supports Web UI access from the Internet by connecting to the WAN ports. For example, start the web browser and go to https://xxx.xxx.xxx.xxx, where xxx.xxx.xxx.xxx is the IP address assigned to a WAN port (see Configuring Network Interface). However, FortiWAN’s Firewall denies any access to FortiWAN’s localhost coming from the Internet (WAN) by default (see Firewall). Therefore, LAN port is the only way for your first time Web UI accessing. Then it is your option to configure network setting to a WAN link (WAN port) and modify the firewall rules to accept localhost accessing from the Internet.
To connect to the CLI

Requires: Terminal emulator such as HyperTerminal, PuTTY, Tera Term, or a terminal server l Using the console cable, connect the appliance’s console port to your terminal server or computer. On your computer or terminal server, start the terminal emulator

  • Use these settings:
  • Bits per second: 9600 l Data bits: 8 l Parity: None l Stop bits: 1 l Flow control: None
  • Press Enter on your keyboard to connect to the CLI
  • Login with the default username, admin, and leave the password field blank (case sensitive)

FortiWAN maintains a common local authentication database for its Web UI and CLI. Accounts defined as group Administrator are able to CLI with its username and password.

Note: FortiWAN CLI has limited functionality and cannot fully configure the system. Normal configuration changes should be done via the WebUI.

Change network setting to LAN port via CLI
  1. Connect and log into the CLI (See the section “To connect to the CLI” above).
  2. Configure the IP address and netmask of LAN pot via command resetconfig. Also configure a static route with a default gateway if it’s necessary. Type:

resetconfig <ip_address/netmask>

resetconfig <ip_address/netmask> <network_ip/netmask@gateway_ip> where:

<ip_address/netmask> is the IPv4 address and netmask assigned to the LAN port. It must correspond to the subnet you would like to connect to. For example, type resetconfig 10.10.10.1/255.255.255.0, if 10.10.10.0/255.255.255.0 is the subnet connected to the LAN port. Then IP address of LAN port is changed to

10.10.10.1 from the default.

<network_ip/netmask@gateway_ip> is the routing rule assigned to the LAN port, so that packets can be routed to the subnet via the gateway. For example, type resetconfig 192.168.2.254/255.255.255.0 192.168.1.0/255.255.255.0@192.168.2.1, if 192.168.2.0/255.255.255.0 is the subnet connected directly to the LAN port and 192.168.2.1 is the gateway to route packets to subnet 192.168.1.0/255.255.255.0.

Then IP address of LAN port is changed to 192.168.2.254 from the default.

See “Console Mode Commands” for details.

  1. System reboots for applying the configurations.

Having trouble configuring your Fortinet hardware or have some questions you need answered? Check Out The Fortinet Guru Youtube Channel! Want someone else to deal with it for you? Get some consulting from Fortinet GURU!

FortiWAN in HA (High Availability) Mode

FortiWAN in HA (High Availability) Mode

Installing FortiWAN in HA mode

When two FortiWAN units work together, they can be configured to HA (High Availability) double-device backup mode. This setup allows two FortiWAN units to server as backup for each other. The master is the main functioning unit, while the slave is the backup unit in standby. An FortiWAN unit alone already has built-in fault tolerance mechanism. All its OS and control applications are stored in Flash Memory, so sudden loss of electricity will not damage the system. But when the network must provide non-stop service for mission-critical applications, the HA mode becomes a must. With HA, FortiWAN serves a significant solution to accomplish network fault tolerance.

FortiWAN supports hot backup in HA by heartbeat mechanism. When both FortiWAN are on, one unit (the master) performs operations, with the other (the slave) in standby. If the master fails for power failure or hardware failure (including normal power off and system reboot), hot backup performs a switch-over to the slave (heartbeat detection fails). This function logically promotes the slave to activate HA and to resume the role of the master. The failed master unit will take the role of slave after it resumes from reboot. The HA hot-backup solution significantly limits the downtime, and secures uninterrupted operation for critical applications.

Hot backup also implies data synchronization. FortiWAN HA performs system configurations synchronization between the master and slave units. Applying configurations to the master unit from Web UI triggers a synchronization to the slave unit. Besides, as long as the peer unit resumes as slave mode from system rebooting, the master also synchronizes system configures with it. This mechanism guarantees the identical system configurations for the two units.

In case that two units are inconsistent with firmware version, FortiWAN model and throughput license, only one unit takes the role of master while the peer unit stay the booting status. A master unit cannot synchronize system configurations with the unit that is in booting status. A message “Incompatible” is displayed for Peer Information in the Summary page of the master’s Web UI.

Setting Up HA

FortiWAN’s double-device backup setup is easy to use. Simply connect the HA RJ-45 ports on both FortiWAN units with a Ethernet cable. Note that HA deployment requires identical firmware version, model and throughput license on the two units.

Activating HA Mode

  1. Install the master FortiWAN.
  2. Connect the slave FortiWAN to the master with a Ethernet cable.
  3. Switch on the slave.

FortiWAN-VM uses the vNIC1 as the HA port. To deploy FortiWAN-VM appliances as HA mode, allocate the vNIC1 of two appliances to the same virtual network (vSwitch). HA deployment is not supported for two FortiWAN-VM appliances that both are 15-day trails. It requires one 60-day trial or a permanent license for the two appliances (in DH mode) at least.

After HA mode has been activated, the Master emits 4 beeps, and the Slave does 3. The status of the Slave is displayed under [System] > [Summary] > [Peer Information] on the master’s Web UI. Note that a slave’s Web UI is not available.

Once the master is down, the slave emits 1 beep and resumes the role of the master to keep network alive.

Switching on the two units together, then the unit with larger Up Time or Serial Number takes the role of master, while the peer unit takes the role of slave.

Note: Ensure the cable is solidly plugged in both units. Otherwise, it may cause errors. After the master locates the slave, system will activate HA mode.

Redundant LAN Port and/or redundant DMZ port: FortiWAN in HA mode

As illustrated in the topology below, two FortiWAN units work in HA mode, with one active and the other in standby. Port1 and port2 acts as redundant LAN port for each other, putting the two units into hot backup mode. This mode offers a significant solution against single point failure in LAN/DMZ (See “Configurations for VLAN and Port Mapping”).

High Availability (HA) Scenarios

Firmware Update Procedure in HA Deployment

Firmware update on both master and slave units under HA deployment can be completed at once (one firmware update instruction). The firmware update procedure in HA deployment is similar to the non-HA (single unit) procedure:

  1. Log onto the master unit as Administrator, go to [System]→[Summary], double check and make sure the peer device is under normal condition (See “Summary”).
  2. Execute the firmware update with uploading the firmware file (See “Administrator”). Please wait as this may take a while.

The master unit starts with verifying the uploaded firmware file for master and slave units (system can not be uploaded with a firmware file that is earlier than the version system is running on). The slave unit then receives a duplicate of firmware file from master unit, and starts to update firmware. The master unit holds on updating itself until the update on slave unit completes. Once slave completes its update, the master unit starts updating itself then, while slave gets into reboot procedure. The whole update procedure will complete after the two units recover from system reboot. The asynchronous update procedure on the two units causes the peer unit recovering from reboot earlier than local unit, and the master-slave relationship will switch therefore.

The whole firmware update will be aborted if any abnormality happens during updating on slave. The master unit will not get updating itself without updating successfully on slave unit. Abnormal termination of firmware update does not trigger system reboot, and therefore the master-slave relationship will not switch.

During the firmware update, the heartbeat mechanism over master and slave units stops temporarily until the firmware update succeeds or is terminated by abnormality.

After the firmware update is complete, the firmware version number displayed in fields [System Information] and [Peer Information] on Web UI page [System > Summary] should be updated and identical. The information displayed in field [Peer Information] gives reference to judge the update.

Version = Updated version number, State = Slave: Firmware update succeeds on both units.

Version = Non-updated version number, State = Slave: Firmware update is aborted by abnormalities. Both units fail to update. Please perform the HA firmware update again (with [Update Slave] being checked).

Version = Updated version number, State = Incompatible: The peer unit succeeds in updating, but the local unit fails. Please perform the single unit firmware update (without [Update Slave] being checked).

Version = Non-updated version number, State = Incompatible: The local unit succeeds in updating, but the peer unit fails. Please reboot local unit to switch the master-slave relationship of the two units. Reconnect and login to Web UI, and perform the single unit firmware update (without [Update Slave] being checked).

Note: If there are abnormal behaviors in the DMZ or public IP servers, go to [System] → [Diagnostic Tools] → [ARP Enforcement] and execute [Enforce] for troubleshooting. Also notice that if the Ethernet cable for HA between the master and slave is removed or disconnected.

If abnormal behaviors appear consistently, please remove the network and HA cable, and perform the firmware update procedure again to both system individually.Then reconnect them to the network as well as the HA deployment.

If repetitive errors occur during the firmware update process, DO NOT ever switch off the device and contact your dealer for technical support.

HA Fallback to Single Unit Deployment

The steps to fallback to single unit deployment from HA are:

  1. Log onto Web UI via Administrator account. Go to [System] → [Summary]and double check and make sure the peer device is under normal condition (See “Summary”).
  2. Turn the Master off if the Master is to be removed. The Slave will take over the network immediately without impacting services. If the Slave is to be removed, then simply turn the Slave off.
  3. Remove the device and the associated cables. Steps of the Slave Take Over are:
  4. In the HA setup, the Master unit is in an active state and serving the network at the meanwhile the Slave unit is monitoring the Master.
  5. In the case of unit failover (Hardware failure, Power failure, HA cable failure, etc), the Slave takes over the network and beeps once when the switchover is completed. The switchover requires 15 seconds or so since negotiations for states.
  6. The switched Master unit becomes the Slave unit in the HA deployment even it is repaired from failures. You can power cycle the Master unit to have another switchover to the units.

Long-distance HA deployment

Sometimes the two FortiWAN appliances used to establish HA deployment are apart from each other geographically. It requires several Ethernet switches or bridges to connect the two appliances across areas or buildings. Since FortiWAN is designed to join a HA deployment by directly connecting the two RJ-45 ports (HA ports) with a Ethernet cable, it is supposed that there is not any non-HA Ethernet frames broadcasted between the two appliances. The HA messages interchanged for availability detection are raw Ethernet frames of EtherType 0x88B6 (LOCAL2), not 0x0800 (IPv4); and the mechanism of FortiWAN’s HA deployment is very sensitive to non-HA Ethernet frames. For this reason, it requires STP and ARP being disabled on the switch (connecting the two FortiWAN units) to avoid misleading the judgment on HA takeover. Besides, please create a port base VLAN on the switch to isolate the HA connectivity from other subnets if necessary.

Get HA information via SNMP and event notifications via SNMP trap

You can use SNMP manager to get slave unit information and receive notifications when the slave unit fails, recovers and take over the master unit. Configure SNMP for your FortiWAN unit (See “SNMP”) to get the information in a MIB field via SNMP manager. Configure the SNMP manager on your FortiWAN and enable the event types “HA slave failure and recovery” and “HA takeover” to notify (See “Notification”), then notifications will be delivered to your SNMP manager for the events. The correspondent MIB fields and OIDs are listed as following:

SNMP field names and OIDs

MIB Field OID Description
fwnSysHAMode 1.3.6.1.4.1.12356.118.1.1 Boolean values used to indicate if the FortiWAN unit supports HA deployment.
fwnSysSlaveVersion 1.3.6.1.4.1.12356.118.1.2 Firmware version of the slave unit deployed with this local unit in HA mode.


MIB Field OID Description
fwnSysSlaveSerialNumber 1.3.6.1.4.1.12356.118.1.3 Serial number of the slave unit deployed with this local unit in HA mode.
fwnSysSlaveUptime 1.3.6.1.4.1.12356.118.1.4 Uptime of the slave unit deployed with this local unit in HA mode.
fwnSysSlaveState 1.3.6.1.4.1.12356.118.1.5 State of the slave unit deployed with this local unit in HA mode.
fwnEventHASlaveState 1.3.6.1.4.1.12356.118.3.1.3.1 Send event notification when the slave unit deployed with the local (master) unit in HA mode fails or recovers from a failure: recovery

(1), failure(2).

fwnEventHATakeover 1.3.6.1.4.1.12356.118.3.1.3.2 Send event notification when the master (local) unit in HA deployment is took over by its slave unit: true(1), false(2).
See also
  • Summary
  • Configurations for VLAN and Port Mapping l Administrator

Having trouble configuring your Fortinet hardware or have some questions you need answered? Check Out The Fortinet Guru Youtube Channel! Want someone else to deal with it for you? Get some consulting from Fortinet GURU!

Public IP Pass-through (DMZ Transparent Mode)

Public IP Pass-through (DMZ Transparent Mode)

As an intelligent router, FortiWAN is generally supposed to forwards packets between networks connected to its network ports according to the specified IP routing table, and any IP broadcast packet, including the ARP request, would not be forwarded. So that each of the connected network segments should be a separate layer 3 IP network. However, this can be different for particular WAN link deployments – routing-mode WAN links and multiple-static -IP bridge-mode WAN links. FortiWAN’s Public IP Pass-through logically combines a WAN port and a DMZ port to one localhost. By performing Proxy ARP (for IPv4) and ND Proxy (for IPv6) on the combined localhost, the connected layer 1 segments are combined to a common layer 2 segment. An IP network can be deployed and operate correctly over the two network segments. Public IP Pass-through minimizes the adaptation to current network topology and requires no changes to configurations on existing servers while introducing FortiWAN into the network. It is flexible to deploy some of the multiple public IPs that ISP provides for the WAN link to DMZ for external-facing services. Note that Public IP Pass-through will be activated automatically if a WAN link is configured as routing mode and deployed with “subnet in WAN and DMZ”, or configured as multiple-static -IP bridge mode with IP addresses being deployed in both WAN and DMZ segments. The following diagram shows how an IP network 203.69.118.11/255.225.255.248 is deployed over a WAN port and a DMZ port.

See also

l WAN types: Routing mode and Bridge mode l Scenarios to deploy subnets l Configuring your WAN

Scenarios to deploy subnets

No matter an available subnet (routing mode) or an IP range of a shared subnet you obtain from ISP, you will need making a plan how to deploy the multiple IP addresses.

To deploy the available subnet that ISP provides (routing mode) on FortiWAN, there are four different scenarios (be called subnet types as well) for your options:

Subnet in WAN : Deploy the subnet in WAN.
Subnet in DMZ : Deploy the subnet in DMZ.
Subnet in WAN and DMZ : Deploy the subnet in both WAN and DMZ. FortiWAN’s Public IP Passthrough function makes the two Ethernet segments in WAN and in DMZ one IP subnetwork (See “Public IP Pass-through”).
Subnet on Localhost : Deploy the whole subnet on localhost.

For cases of obtaining an IP range (bridge mode), the IP addresses could be allocated to:

IP(s) on Localhost    :   Allocate the IP addresses on localhost.

IP(s) in WAN    :   Allocate the IP addresses in WAN.

IP(s) in DMZ    :   Allocate the IP addresses in DMZ.

Static Routing Subnet

If there are subnets, which are called static routing subnets, connected to a basic subnet, it’s necessary to configure the static routing for external accessing to the static routing subnets.

See also
  • WAN types: Routing mode and Bridge mode
  • Public IP Pass-through
  • Configuring your WAN
  • LAN Private Subnet

VLAN and port mapping

Customers can assign every physical port (except the HA port) to be a WAN port, LAN port or a DMZ port on demand, which is called Port Mapping as well. The WAN ports, LAN ports and DMZ ports are actually physical ports on FortiWAN, they are just not at the fixed positions. The port mapping will be reflected in related configurations. FortiWAN supports IEEE 802.1Q (also known as VLAN Tagging), but it does not support Cisco’s ISL. Every physical port (except the HA port) can be divided into several VLAN with a VLAN switch, and those virtual ports can be mapped to WAN port, LAN port or DMZ port as well.

See also

Configurations for VLAN and Port Mapping

IPv6/IPv4 Dual Stack

FortiWAN supports deployment of IPv6/IPv4 Dual Stack in [Routing Mode], [Bridge Mode: One Static IP], [Bridge Mode: Multiple Static IP] and [Bridge Mode: PPPoE]. For configuration of IPv6/IPv4 Dual Stack, please select appropriate WAN Type (See “WAN types: Routing mode and Bridge mode”) for the WAN link according to the

IPv4 you are provided by ISP as mentioned previously, and configure for IPv4 and IPv6 at the WAN link together.

Except a WAN IPv6 subnet used to deploy for a WAN link, ISP might provide an extra LAN IPv6 subnet for deploying your LAN. Depending on the demand, the LAN IPv6 subnet can be deployed as basic subnet in DMZ as well for the WAN link.


Having trouble configuring your Fortinet hardware or have some questions you need answered? Check Out The Fortinet Guru Youtube Channel! Want someone else to deal with it for you? Get some consulting from Fortinet GURU!

WAN types: Routing mode and Bridge mode

WAN types: Routing mode and Bridge mode

Before configuring the settings of a WAN port (see WAN link and WAN port) on FortiWAN for a WAN link, you need to know the connection type (we will call it WAN link type or WAN type in this document) that ISP provides you to connect to it’s network for accessing the Internet. An ISP provides the Internet access service for customers with various connection types, such as static/dynamic IP address, one/multiple IP address and routing/transparent mode. It depends on what you apply for. Different WAN types involve different mechanisms for ISP and FortiWAN to deliver network connections. When you configure a WAN port for a WAN link, you have to exactly indicate the type of the WAN link to FortiWAN so that it works in the correct way for the WAN link. FortiWAN supports the following WAN types:

l Routing Mode (See “Configurations for a WAN link in Routing Mode”) l Bridge Mode: One Static IP (See “Configurations for a WAN link in Bridge Mode: One Static IP”) l Bridge Mode: Multiple Static IP (See “Configurations for a WAN link in Bridge Mode: Multiple Static IP”) l Bridge Mode: PPPoE (See “Configurations for a WAN link in Brideg Mode: PPPoE”) l Bridge Mode: DHCP Client (See “Configurations for a WAN link in Bridge Mode: DHCP”)

This section shows you the way to recognize the WAN type of a WAN link that you apply to ISP for.

Dynamic-IP WAN link

PPPoE and DHCP are the most common ways (protocols) for ISP to assign dynamic IP addresses and provide the

Internet access service to customers. If you applied for a dynamic-IP WAN link, you can simply configure the WAN port as Bridge Mode: PPPoE or Bridge Mode: DHCP Client for the WAN link. For the two WAN types, you will not be aware of the IP address, netmask and gateway of the WAN link. ISP will provides the account and password for accessing if it is PPPoE.

Static-IP WAN link

ISP will provides you one or multiple static public IP address if you apply for a static-IP WAN link. Generally, static-IP WAN links between ISP’s central offices and customers premises could be divided into routing mode and bridge mode (transparent mode). Each involves different mechanisms. From general customer’s viewpoint, it might be not such important to distinguish between the two modes because it is a kind of back-end stuff. They could access the Internet only if they have the correct IP addresses, netmask and gateway configured. However, for FortiWAN users, it is necessary to exactly indicate the mode of the static-IP WAN link to FortiWAN so that it can cooperate with ISP for the connectivity in the correct mechanism.

Routing mode

If you apply to ISP for a routing-mode WAN link, you will obtain an individual IP network (layer 3) which is separated from any other networks of the ISP. In that case, the ATU-R at a customer premises plays the role of a gateway to route packets between your network and the Internet. In the other words, the ATU-R connects your network with the ISP central office in routing mode. The IP addresses, default gateway and netmask that the ISP provides you can tell you whether a WAN link is routing mode or not. If the number of deducting 3 (network IP, gateway IP and broadcast IP) from the IP range that the netmask determines matches the number of usable IP addresses that ISP provides you, it means you are given a separate network, a routing-mode WAN link. For example, the ISP gives you five usable IP addresses 203.69.118.10 – 203.69.118.14, default gateway 203.69.118.9 and netmask 255.255.255.248. The netmask 255.255.255.248 divides eight IP addresses which contains five host addresses, one gateway address, one broadcast address and one address for the network ID. It just matches the number of the usable IP addresses the ISP provides. In that case you are strongly recommended to configure the WAN link on FortiWAN as Routing Mode.

Bridge mode

Opposite to the routing mode, the ATU-R will play the role of a bridge to combine network segments (data link layer, layer 2) of customer premises and the ISP central office, if the WAN link is in bridge-mode. In that case, ISP allocates a block of IP addresses (or a network segment) of an IP network (layer 3) for you rather than a separate IP network. It implies that you and other customers (other network segments) of the ISP that in the same IP network use the same gateway, which is located at the ISP’s central office.

You can identify a bridge-mode WAN link by the IP addresses, default gateway and netmask that the ISP provides you. If the number of deducting 3 (network IP, gateway IP and broadcast IP) from the IP range that the netmask divides is larger than the number of usable IP addresses that ISP provides you, it means you are given a segment of a IP network, a bridge-mode WAN link. For example, the ISP gives you three usable IP addresses 61.88.100.1 – 61.88.100.3, default gateway 61.88.100.254 and netmask 255.255.255.0. The netmask 255.255.255.0 divides 256 IP addresses which contains 253 host addresses, one gateway address, one broadcast address and one address for the network ID. The number of host addresses that the netmask divides (253) is larger than number of IP addresses the ISP provides (3). You have to configure a WAN link to FortiWAN as Bridge Mode: One Static IP if the WAN link is in bridge-mode and ISP allocates only one IP address for you, or

Bridge Mode: Multiple Static IP if the WAN link is in bridge-mode and ISP allocates multiple IP addresses for you.

Traffic going to or coming from the near WAN (see Near WAN) is treated by FortiWAN in two different ways for routing-mode WAN link and bridge-mode WAN link. Configuring WAN links to FortiWAN as mismatched WAN type results in unexpected behaviors to traffic.

See also

l Configurations for a WAN link in Routing Mode l Configurations for a WAN link in Bridge Mode: One Static IP l Configurations for a WAN link in Bridge Mode: Multiple Static IP l Configurations for a WAN link in Brideg Mode: PPPoE l Configurations for a WAN link in Bridge Mode: DHCP

Near WAN

FortiWAN defines an area in WAN as near WAN, which traffic transferred in/from/to the area would not be counted to the WAN links. That means traffic coming from or going to near WAN through a WAN port would not be controlled by FortiWAN.

FortiWAN defines a near WAN for a WAN link in different ways between routing mode and bridge mode.

  • In routing mode, the default gateway of a subnet deployed in WAN or in WAN and DMZ is near to FortiWAN. Therefore, the area between the default gateway and FortiWAN is called near WAN. In the other words, FortiWAN treats directly the subnet deployed on the WAN port as near WAN. The near WAN contains the default gateway.
  • In bridge mode, the default gateway is located at ISP’s COT and the IP addresses allocated on FortiWAN are just a small part of a subnet shared with others. Therefore, only the IP addresses deployed in WAN are treated as near WAN (not include the remote gateway).

This is the reason FortiWAN separates WAN link configuration into different type: routing mode and bridge mode (See “WAN types: Routing mode and Bridge mode”). If you configure a bridge-mode WAN link that ISP provides on FortiWAN as Routing Mode and the bridge-mode WAN link might belong to a shared class C subnet, FortiWAN treats the whole class C network as near WAN, traffic goes to or comes from the class C network would be ignored for FortiWAN’s balancing, management and statistics functions. That would be a big mistake.

See also

WAN types: Routing mode and Bridge mode


Having trouble configuring your Fortinet hardware or have some questions you need answered? Check Out The Fortinet Guru Youtube Channel! Want someone else to deal with it for you? Get some consulting from Fortinet GURU!