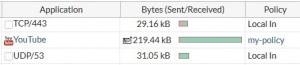
Links created between FortiView and View/Create Policy
The Policy column in FortiView consoles and the Log Viewer pages has changed to a link, which navigates to the
IPv4 or IPv6 policy list and highlights the policy.
Right-clicking on a row in FortiView or the Log Viewer has menu items for Block Source, Block Destination and Quarantine Source where appropriate columns are available to determine these values. When multiple rows are selected, the user will be prompted to create a named Address Group to contain the new addresses.
When the user clicks Block Source or Block Destination they are taken to a policy creation page with enough information filled in to create a policy blocking the requested IP traffic.
The policy page will feature an informational message block at the top describing the actions that will be taken. Once the user submits the form, the requisite addresses, groups and policy will be created at once.
If the user clicks on Quarantine User then they will be prompted for a duration. They may also check a box for a
Permanent Ban. The user can manage quarantined users under Monitor > User Quarantine Monitor.