SIP NAT configuration example: destination address translation (destination NAT)
This configuration example shows how to configure the FortiGate unit to support the destination address translation scenario shown in the figure below. The FortiGate unit requires two SIP security policies:
- A destination NAT security policy that allows SIP messages to be sent from the Internet to the private network. This policy must include destination NAT because the addresses on the private network are not routable on the Internet.
- A source NAT security policy that allows SIP messages to be sent from the private network to the Internet.
SIP destination NAT scenario part two: 200 OK returned to Phone B and media streams established
FortiGate-620B Cluster
SIP proxy server
Virtual IP: 172.20.120.50
SIP Phone A (PhoneA@10.31.101.20)
SIP proxy server
10.31.101.50
SIP Phone B (PhoneB@172.20.120.30)
General configuration steps
The following general configuration steps are required for this destination NAT SIP configuration. This example uses the default VoIP profile.
1. Add the SIP proxy server firewall virtual IP.
2. Add a firewall address for the SIP proxy server on the private network.
3. Add a destination NAT security policy that accepts SIP sessions from the Internet destined for the SIP proxy server virtual IP and translates the destination address to the IP address of the SIP proxy server on the private network.
4. Add a security policy that accepts SIP sessions initiated by the SIP proxy server and destined for the Internet.
Configuration steps – web-based manager
To add the SIP proxy server firewall virtual IP
1. Go to Policy & Objects > Virtual IPs.
2. Add the following SIP proxy server virtual IP.
VIP Type IPv4
Name SIP_Proxy_VIP
Interface port1
Type Static NAT
External IP Address/Range 172.20.120.50
Mapped IP Address/Range 10.31.101.50
To add a firewall address for the SIP proxy server
1. Go to Policy & Objects > Addresses.
2. Add the following for the SIP proxy server:
Address Name SIP_Proxy_Server
Type Subnet
Subnet/IP Range 10.31.101.50/255.255.255.255
Interface port2
To add the security policies
1. Go to Policy & Objects > IPv4 Policy.
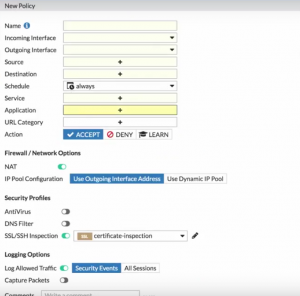
2. Add a destination NAT security policy that includes the SIP proxy server virtual IP that allows Phone B (and other SIP phones on the Internet) to send SIP request messages to the SIP proxy server.
Incoming Interface port1
Outgoing Interface port2
Source all
Destination Address SIP_Proxy_VIP
Schedule always
Service SIP
Action ACCEPT
3. Turn on NAT and select Use Outgoing Interface Address.
4. Turn on VoIP and select the default VoIP profile.
5. Select OK.
6. Add a source NAT security policy to allow the SIP proxy server to send SIP request messages to Phone B and the Internet:
Incoming Interface port2
Destination Address all
Source SIP_Proxy_Server
Schedule always
Service SIP
Action ACCEPT
7. Turn on NAT and select Use OutgingInterface Address.
8. Turn on VoIP and select the default VoIP profile.
9. Select OK.
Configuration steps – CLI
To add the SIP proxy server firewall virtual IP and firewall address
1. Enter the following command to add the SIP proxy server firewall virtual IP.
config firewall vip edit SIP_Proxy_VIP
set type static-nat
set extip 172.20.120.50 set mappedip 10.31.101.50 set extintf port1
end
2. Enter the following command to add the SIP proxy server firewall address.
config firewall address edit SIP_Proxy_Server
set associated interface port2 set type ipmask
set subnet 10.31.101.50 255.255.255.255 end
To add security policies
1. Enter the following command to add a destination NAT security policy that includes the SIP proxy server virtual IP
that allows Phone B (and other SIP phones on the Internet) to send SIP request messages to the SIP proxy server.
config firewall policy edit 0
set srcintf port1 set dstintf port2 set srcaddr all
set dstaddr SIP_Proxy_VIP
set action accept set schedule always set service SIP
set nat enable
set utm-status enable
set voip-profile default end
2. Enter the following command to add a source NAT security policy to allow the SIP proxy server to send SIP request messages to Phone B and the Internet:
config firewall policy edit 0
set srcintf port2 set dstintf port1
set srcaddr SIP_Proxy_Server set dstaddr all
set action accept set schedule always
set service SIP
set nat enable
set utm-status enable
set voip-profile default end