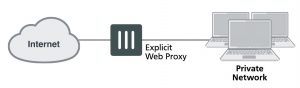
Example explicit web proxy topology
To allow all explicit web proxy traffic to pass through the FortiGate unit you can set the explicit web proxy default firewall policy action to accept. However, in most cases you would want to use security policies to control explicit web proxy traffic and apply security features such as access control/authentication, virus scanning, web filtering, application control, and traffic logging. You can do this by keeping the default explicit web proxy security policy action to deny and then adding web-proxy security policies.
You can also change the explicit web proxy default security policy action to accept and add explicit web proxy security policies. If you do this, sessions that match web-proxy security policies are processed according to the security policy settings. Connections to the explicit web proxy that do not match a web-proxy security policy are allowed with no restrictions or additional security processing. This configuration is not recommended and is not a best practice.
The explicit web-proxy can accept VIP addresses for destination address. If an external IP matches a VIP policy, the IP is changed to the mapped-IP of the VIP.
Web-proxy policies can selectively allow or deny traffic, apply authentication, enable traffic logging, and use security profiles to apply virus scanning, web filtering, IPS, application control, DLP, and SSL/SSH inspection to explicit web proxy traffic.
You cannot configure IPsec, SSL VPN, or Traffic shaping for explicit web proxy traffic. Web Proxy policies can only include firewall addresses not assigned to a FortiGate unit interface or with interface set to Any. (On the web-based manager you must set the interface to Any. In the CLI you must unset the associated- interface.)
Authentication of explicit web proxy sessions uses HTTP authentication and can be based on the user’s source IP address or on cookies from the user’s web browser. For more information, see Explicit web proxy authentication on page 2919.
To use the explicit web proxy, users must add the IP address of a FortiGate interface on which the explicit web proxy is enabled and the explicit web proxy port number (default 8080) to the proxy configuration settings of their web browsers.
On FortiGate units that support it, you can also enable web caching for explicit web proxy sessions.
General explicit web proxy configuration steps
You can use the following general steps to configure the explicit web proxy.
To enable the explicit web proxy – web-based manager:
1. Go to Network > Explicit Proxy. Select HTTP/HTTPS beside Enable Explicit Web Proxy to turn on the explicit web proxy for IPv4 HTTP and HTTPS traffic.
You can also select FTP to enable the web proxy for FTP over HTTP sessions in a web browser (not an FTP client) and PAC to enable automatic proxy configuration.
You can also optionally change the HTTP port that the proxy listens on (the default is 8080) and optionally specify different ports for HTTPS, FTP, and PAC.
2. Optionally select Enable IPv6 Explicit Proxy to turn on the explicit web proxy for IPv6 traffic.
If you enable both the IPv4 and the IPv6 explicit web proxy you can combine IPv4 and IPv6 addresses in a single explicit web proxy policy to allow both IPv4 and IPv6 traffic through the proxy.
3. Select Apply.
The default explicit web proxy configuration has Default Firewall Policy Action set to Deny and requires you to add a security policy to allow access to the explicit web proxy. This configuration is recommended as a best practice because you can use security policies to control access to the explicit web proxy and also apply security features such as logging, UTM, and authentication (by adding identity-based policies).
4. Go to Network > Interfaces and select one or more interfaces for which to enable the explicit web proxy. Edit the interface and select Enable Explicit Web Proxy.
Enabling the explicit web proxy on an interface connected to the Internet is a security risk because anyone on the Internet who finds the proxy could use it to hide their source address. If you enable the proxy on such an interface make sure authentication is required to use the proxy.
5. Go to Policy & Objects > Addresses and select Create New to add a firewall address that matches the source address of packets to be accepted by the explicit proxy.
Category Address
Name Internal_subnet
Type IP Range
Subnet / IP Range 10.31.101.1 – 10.31.101.255
Interface any*
*The Interface must be set to Any.
You can also set the Type to URL Pattern (Explicit Proxy) to add a destination URL that is only used by the explicit proxy. For example, to create an explicit policy that only allows access to Fortinet.com:
Category Address
Name Fortinet-web-sites
Type URL Pattern (Explicit Proxy)
URL Pattern fortinet.com
Interface any
6. Go to Policy & Objects > Explicit Proxy Policy and select Create New. Configure the policy as required to accept the traffic that you want to be allowed to use the explicit web proxy.
The source address of the policy must match the client’s source IP addresses. The interface of this firewall address must be set to any.
The destination address of the policy should match the IP addresses of web sites that clients are connecting to. Usually the destination address would be all if proxying Internet web browsing. You could also specify a URL firewall address to limit the policy to allowing access to this URL.
If Default Firewall Policy Action is set to Deny (under Network > Explicit Proxy), traffic sent to the explicit web proxy that is not accepted by a web-proxy policy is dropped. If Default Firewall Policy Action is set to Allow then all web-proxy sessions that don’t match with a security policy are allowed.
For example, the following security policy allows users on an internal network to access fortinet.com websites through the wan1 interface of a FortiGate unit.
Explicit Proxy Type Web
Source Address Internal_subnet
Outgoing Interface wan1
Destination Address Fortinet-web-sites
Schedule always
Action ACCEPT
Add security profiles as required.
7. Select Create New to add another explicit web proxy and set the Action to AUTHENTICATE to require authentication to access the explicit web proxy. For example:
Explicit Proxy Type Web
Source Address Internal_subnet
Outgoing Interface wan1
Destination Address Fortinet-web-sites
Schedule always
Action AUTHENTICATE
Select Create New to add an Authentication Rule and configure the rule as follows:
Groups Proxy-Group
Source User(s) (optional)
Schedule always
Add security profiles as required and select OK.
You can add multiple user identity policies to apply different authentication for different user groups and users and also apply different UTM and logging settings for different user groups.
You can change the User Authentication Options if required. In most cases you can accept the defaults.
8. Optionally enable Web Caching.
9. Select OK.
When you are authenticating to the explicit proxy, are your credentials passing in clear text from your browser to the proxy?
I believe it does. I will confirm just to be certain.